

When creating a pixel labeling job for semantic segmentation you’ll need to host your own data in a CORS configured S3 bucket in order to utilize the Superpixels and Magic Wand tools. This guide outlines the general steps to CORS configure your data to be pulled into the platform to be successfully used with our tool.
Steps:
- 1. Login to your AWS console
- 2. Navigate to Services > Storage > S3
- 3. You will now see a list of buckets you have access to in your account
- 4. Find bucket to be used in your job
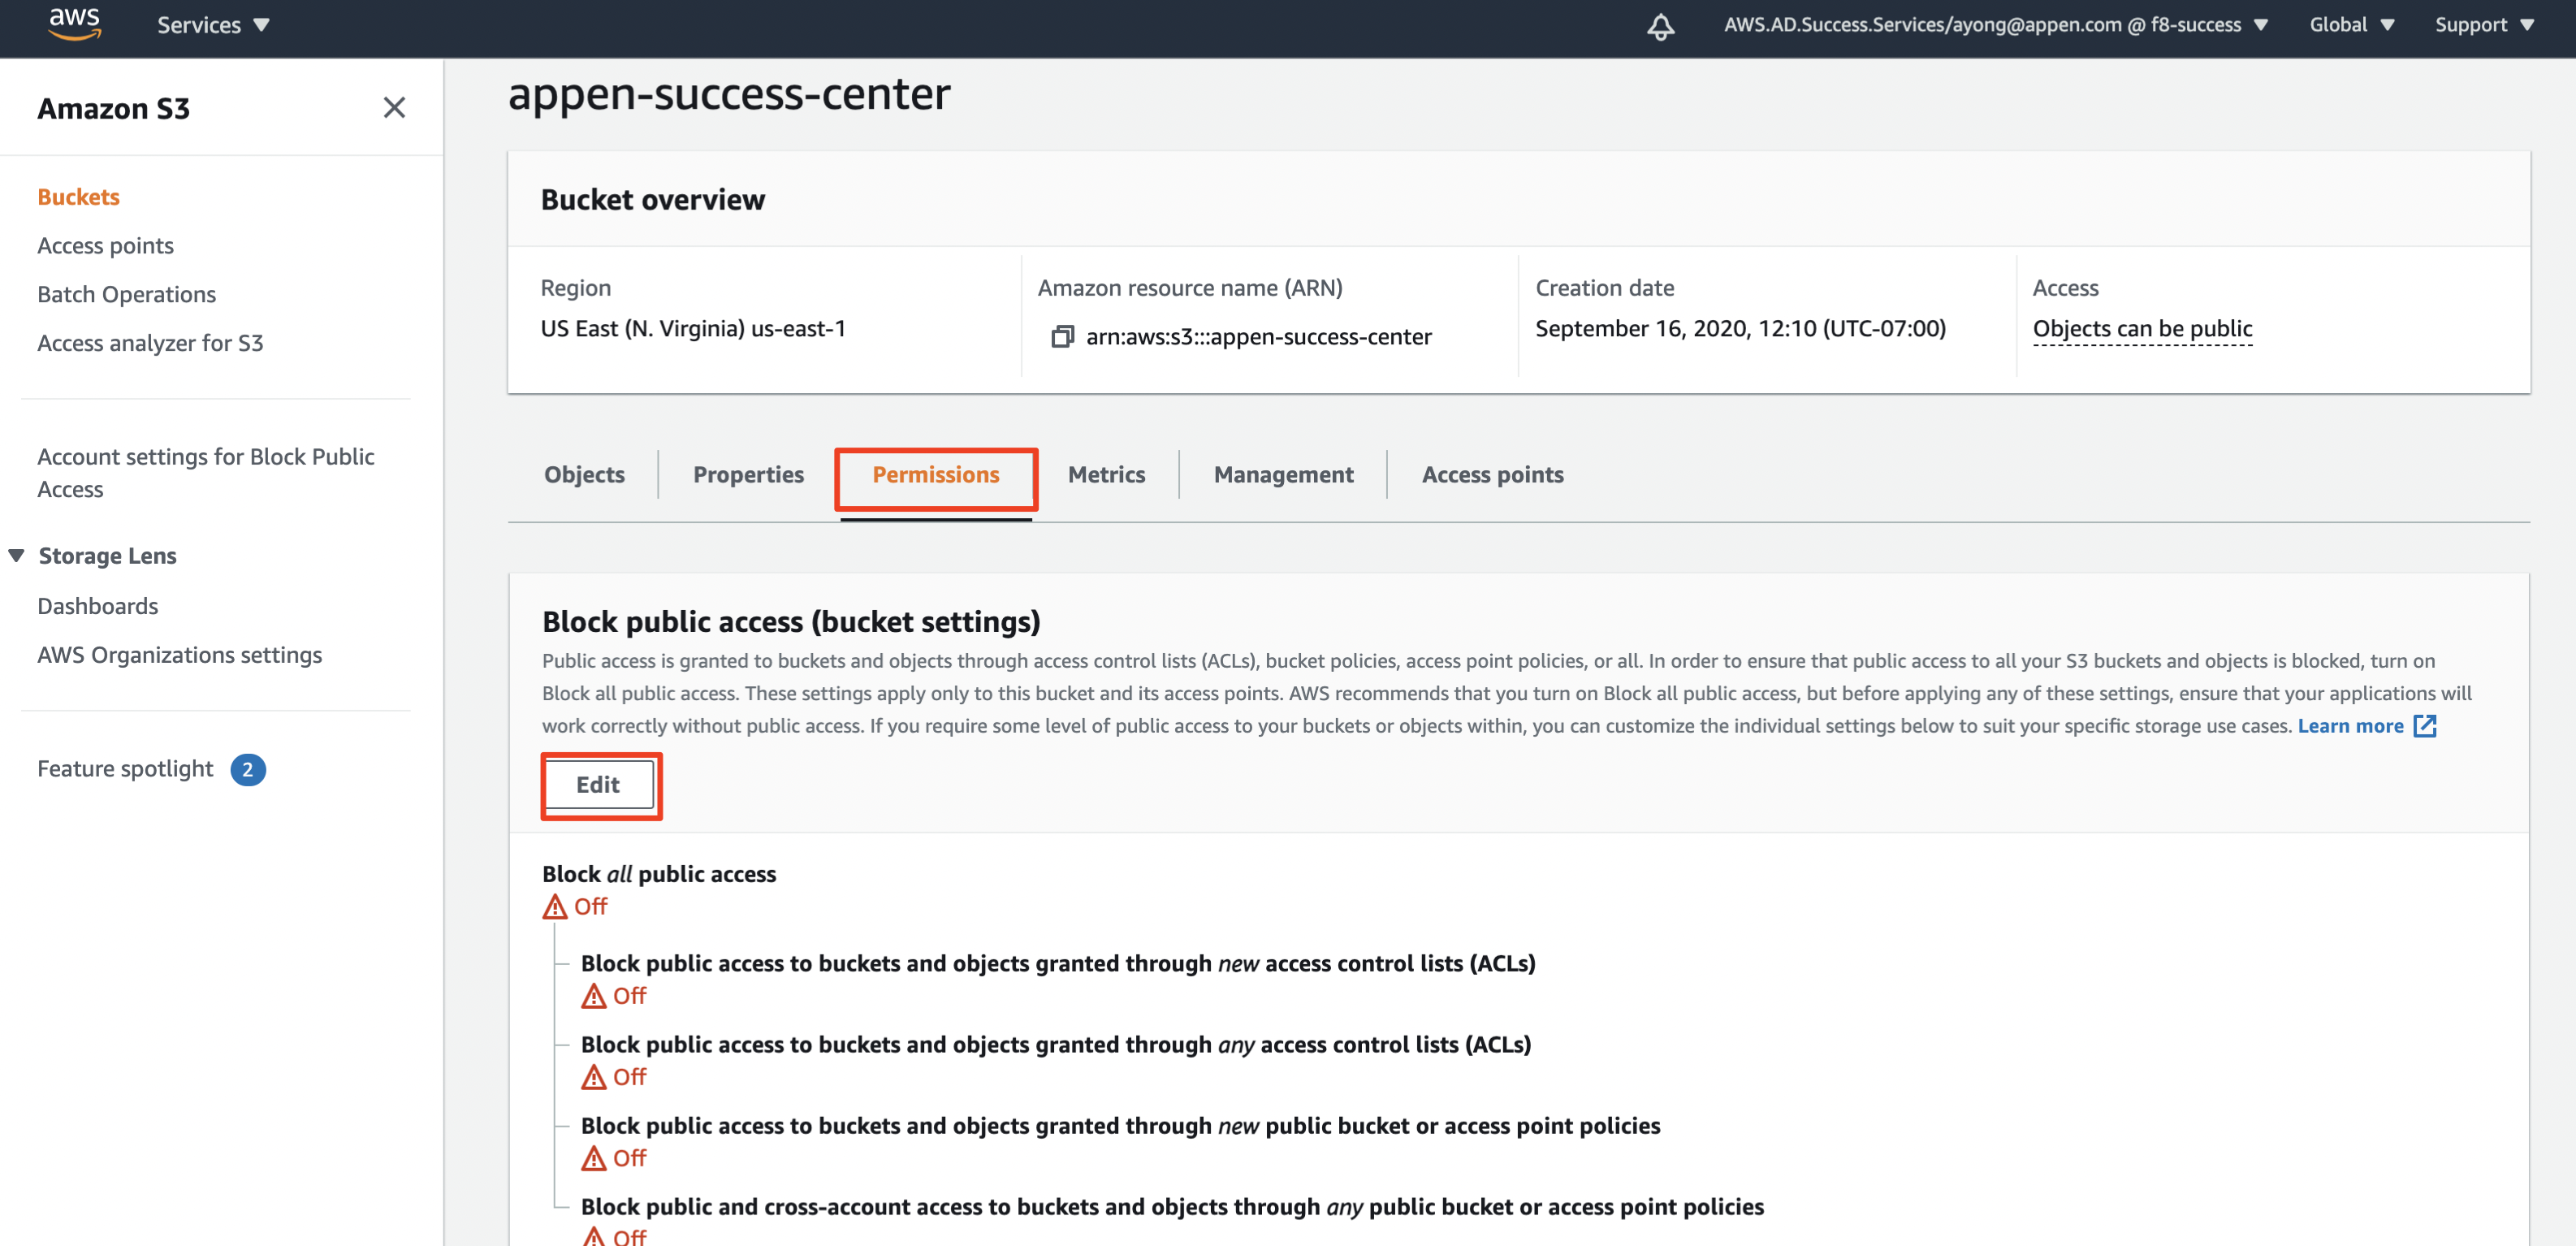
- 5. To make images public, go to the Permissions tab and ensure ”Block all public access" is "Off". If you need to Edit the permissions, click 'Edit'.
- 8. To CORS configure the bucket scroll all the way down to the "Cross-origin resource sharing (CORS)" section and click 'Edit':
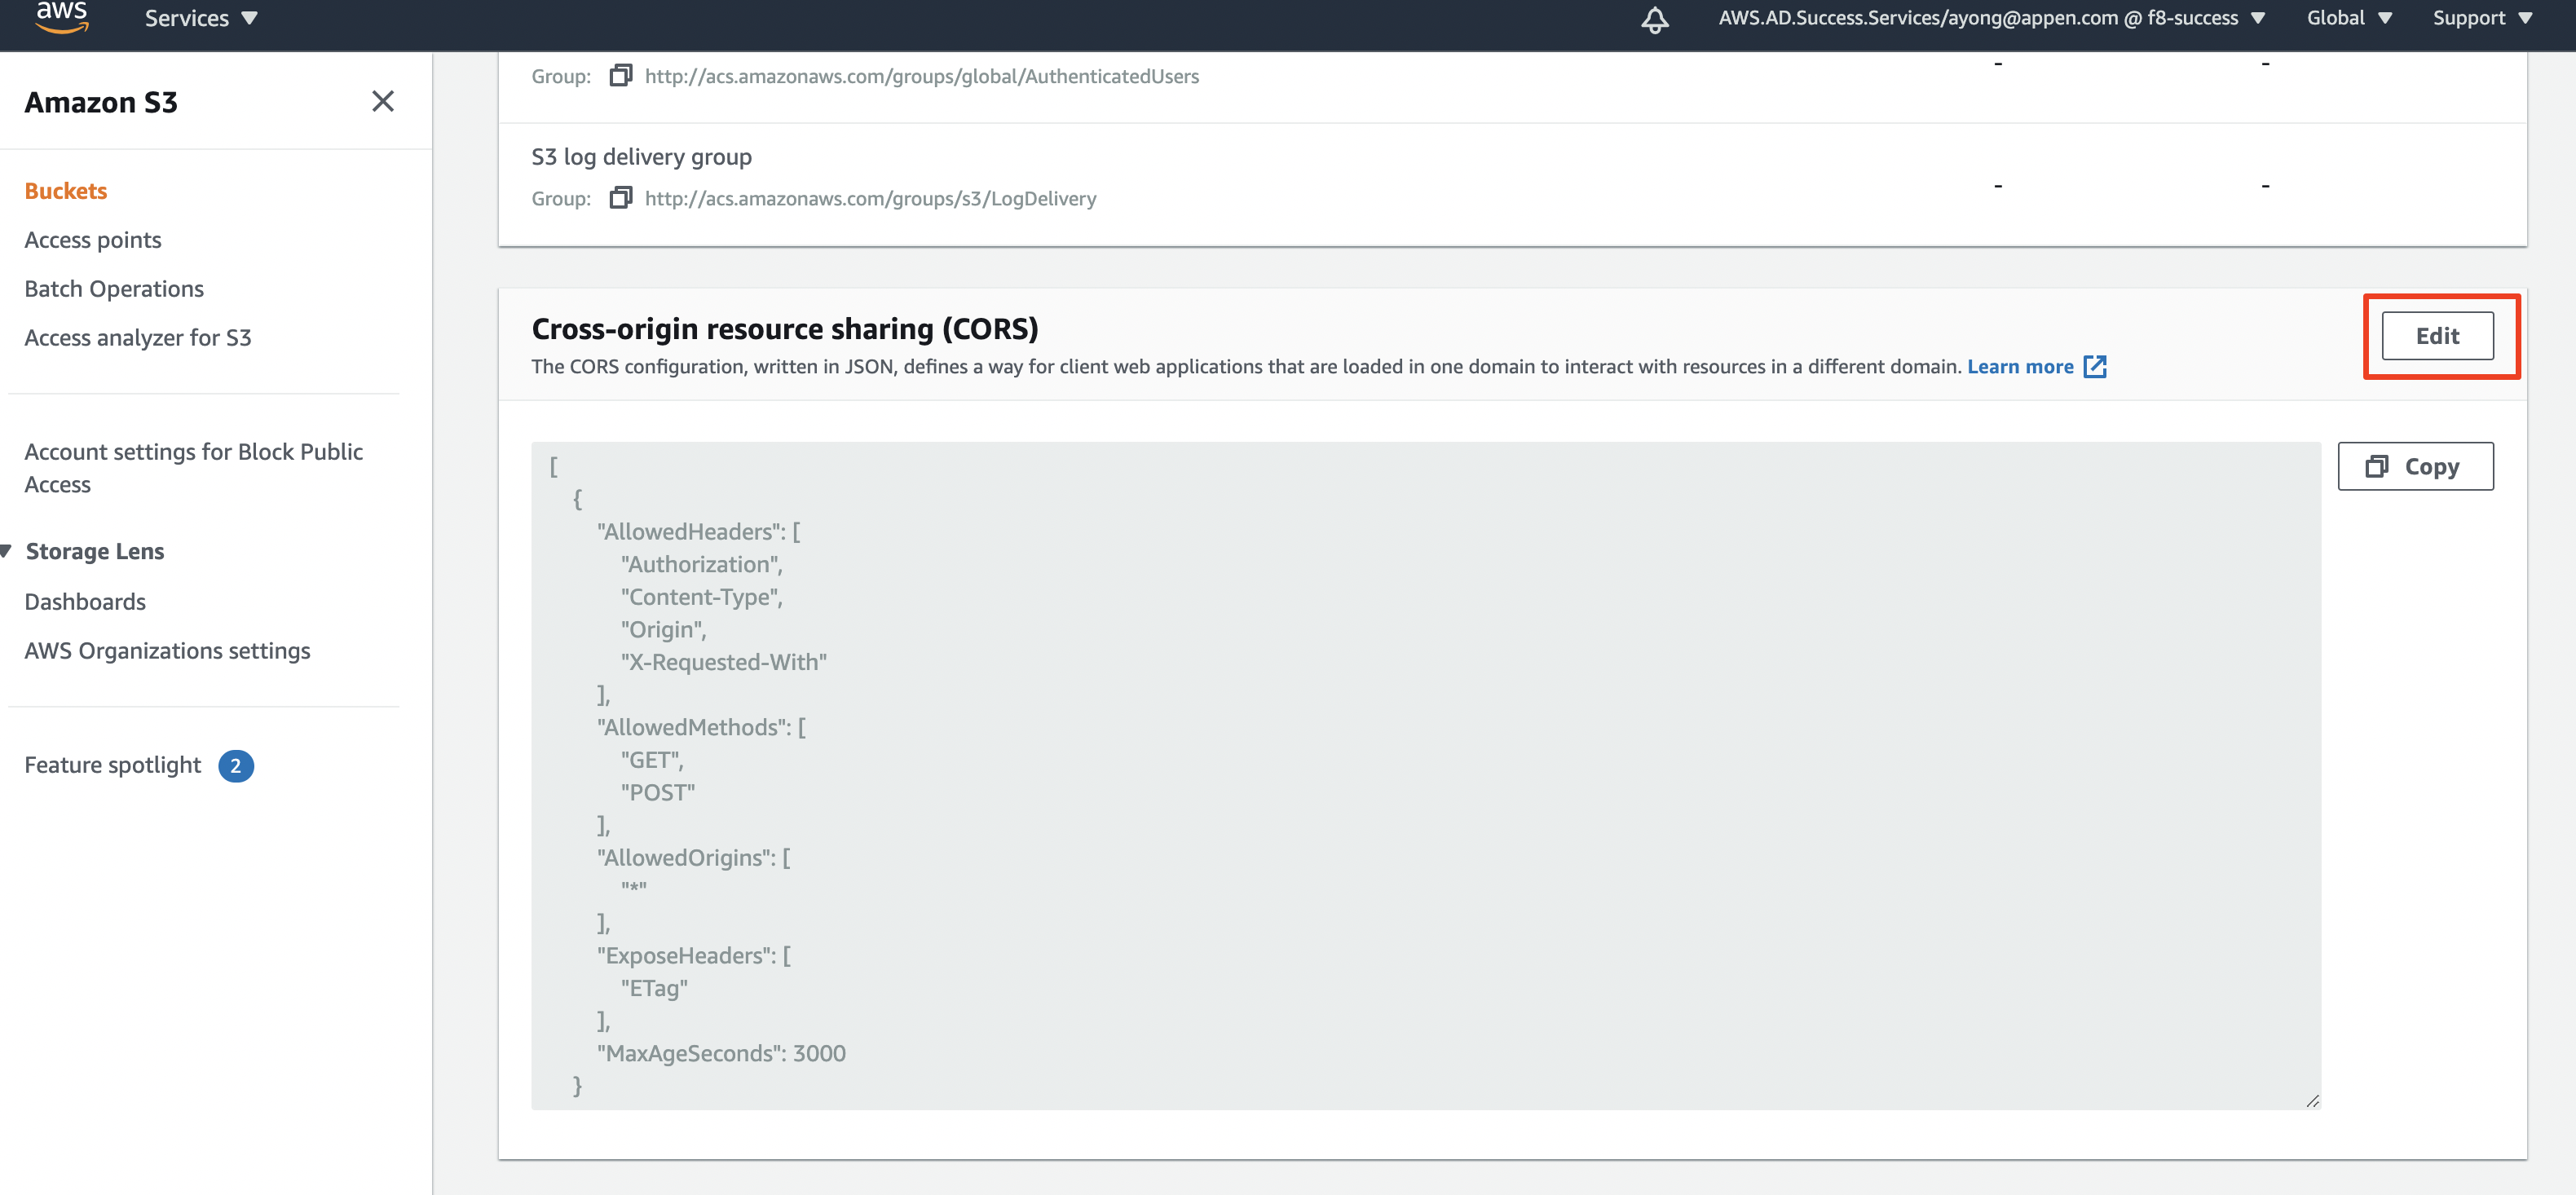
- 9. Paste in code (as seen below) and save:
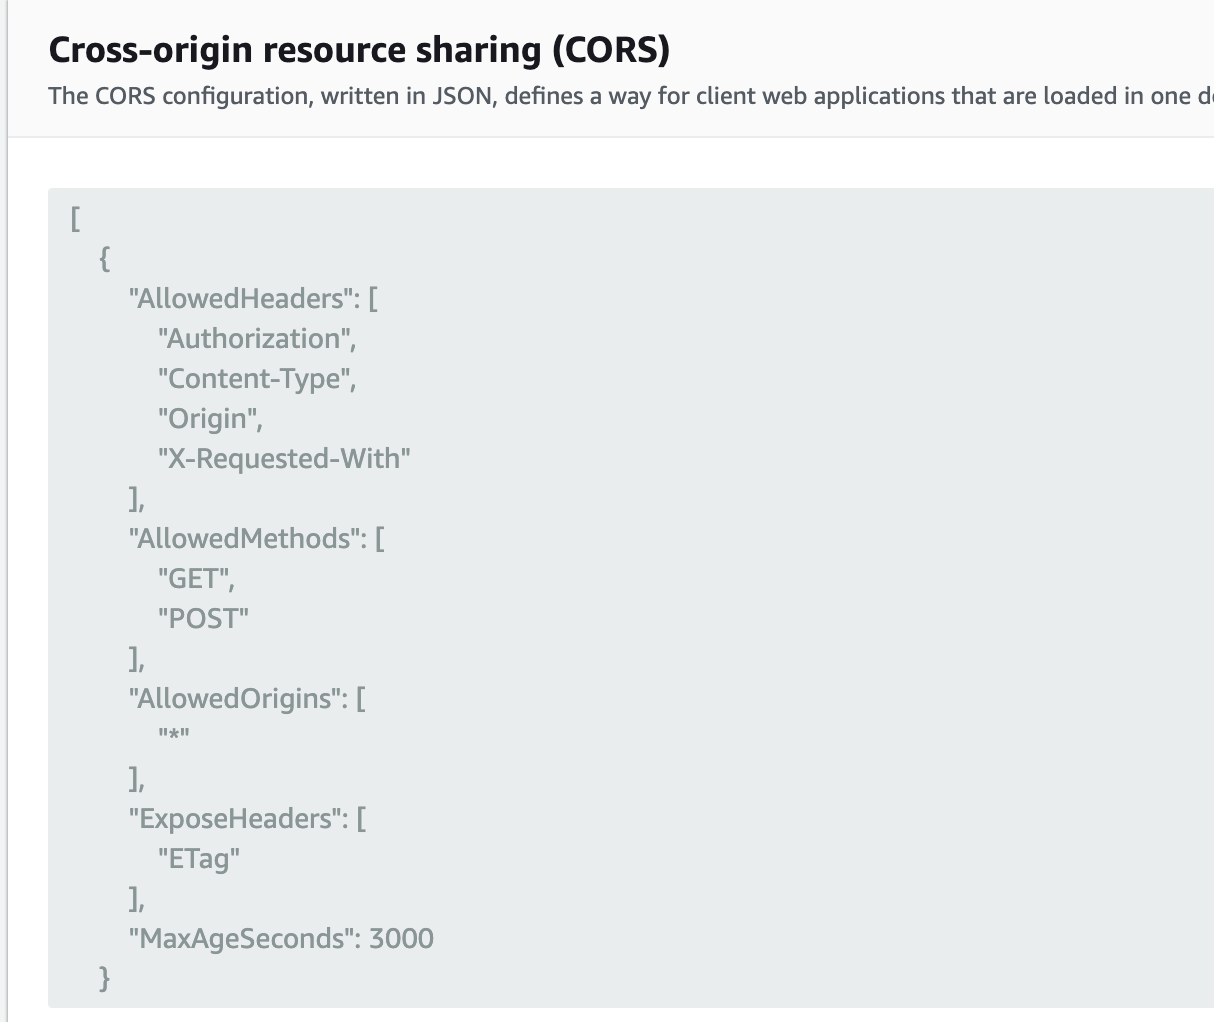
Code:
[
  {
    "AllowedHeaders": [
      "Authorization",
      "Content-Type",
      "Origin",
      "X-Requested-With"
    ],
    "AllowedMethods": [
      "GET",
      "POST"
    ],
    "AllowedOrigins": [
      "*"
    ],
    "ExposeHeaders": [
      "ETag"
    ],
    "MaxAgeSeconds": 3000
  }
]
Best practices when using S3:
- Keep image names and buckets anonymous as the generated links will show the file path
- If desired, expiration times can be added to images
- For any bucket that is CORS configured and public, child buckets inherit all settings
For more AWS documentation, please visit their support site.