

This tutorial will show you how to create and run a job on Appen's Basic platform. In this example, we will categorize a list of 100 companies.
There are six basic steps to running jobs:
- Upload your Data: Upload the data that you want contributors to process.
- Create your Job: Use our form editors to create the interface that contributors will use to complete the job.
- Create Test Questions: Complete a small number of rows yourself, or upload a data file containing data with the correct responses. We'll use test rows to ensure you are obtaining high-quality responses.
- Calibrate Settings: Set the price, judgments per row and rows per page for your job.
- Launch your Job: Send the job to the crowd.
- Obtain Judgments: Monitor and correct Test Questions as appropriate.
- Retrieve and Interpret your Results: Complete your job, at which point results are automatically compiled, stored and aggregated.
Upload your Data
You can import data in a number of ways including uploading a data file, pulling a data feed, or sending data via the Appen API. The most common method is to upload a CSV. If your project doesn't require data (e.g., a survey), click here for the appropriate tutorial. Once your data is uploaded into the job, each row in the data file will become an individual block of data, which we refer to as a row.
Note: CSVs need to be UTF-8 encoded
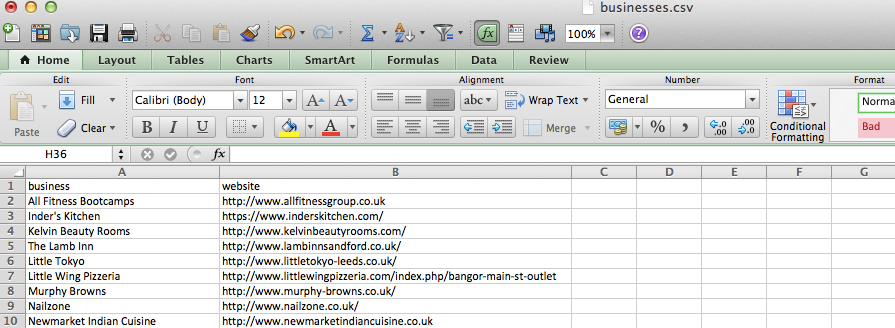
Fig. 1: Data file to upload to your job
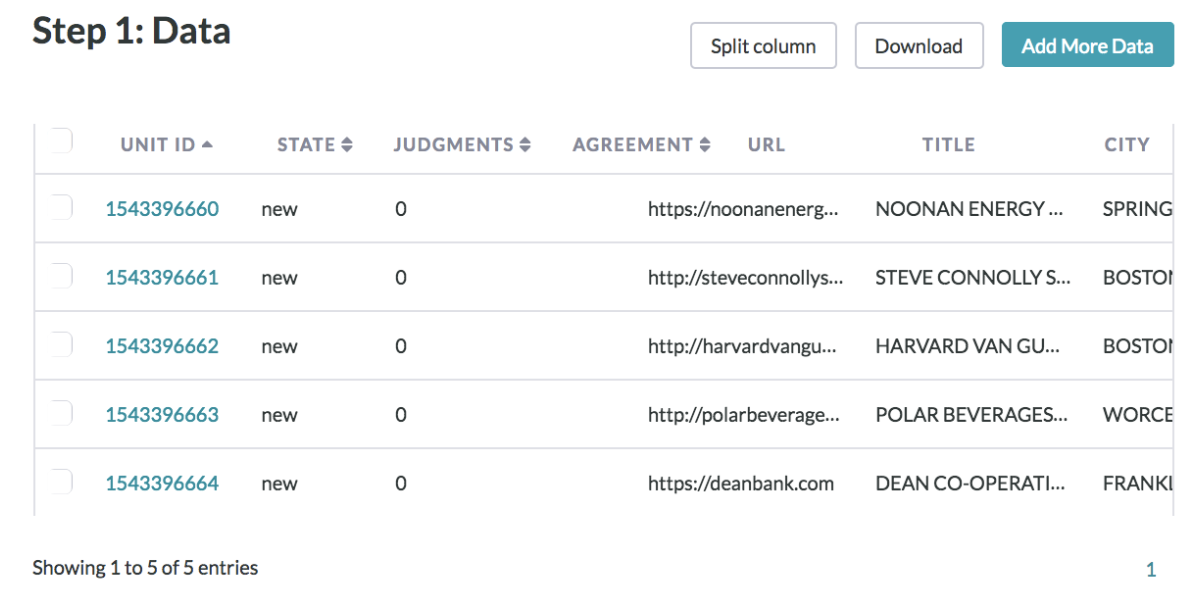
Fig. 2: Data after it has been uploaded to your job
Create your Job
Once data has been loaded into your job, it's time to create a job that will allow contributors to interact with those rows in some useful way.
From the contributor’s point of view, the job is where individual questions are posed or pages are explained. But even if the structure of a job remains the same across all users, the rows of data associated with given questions are dynamic and may vary user by user.
In this example, the author of this job has opted to display two fields from a row, the company name and the URL. While these values will change dynamically for each contributor, the question and the radio buttons for capturing contributor input will not.
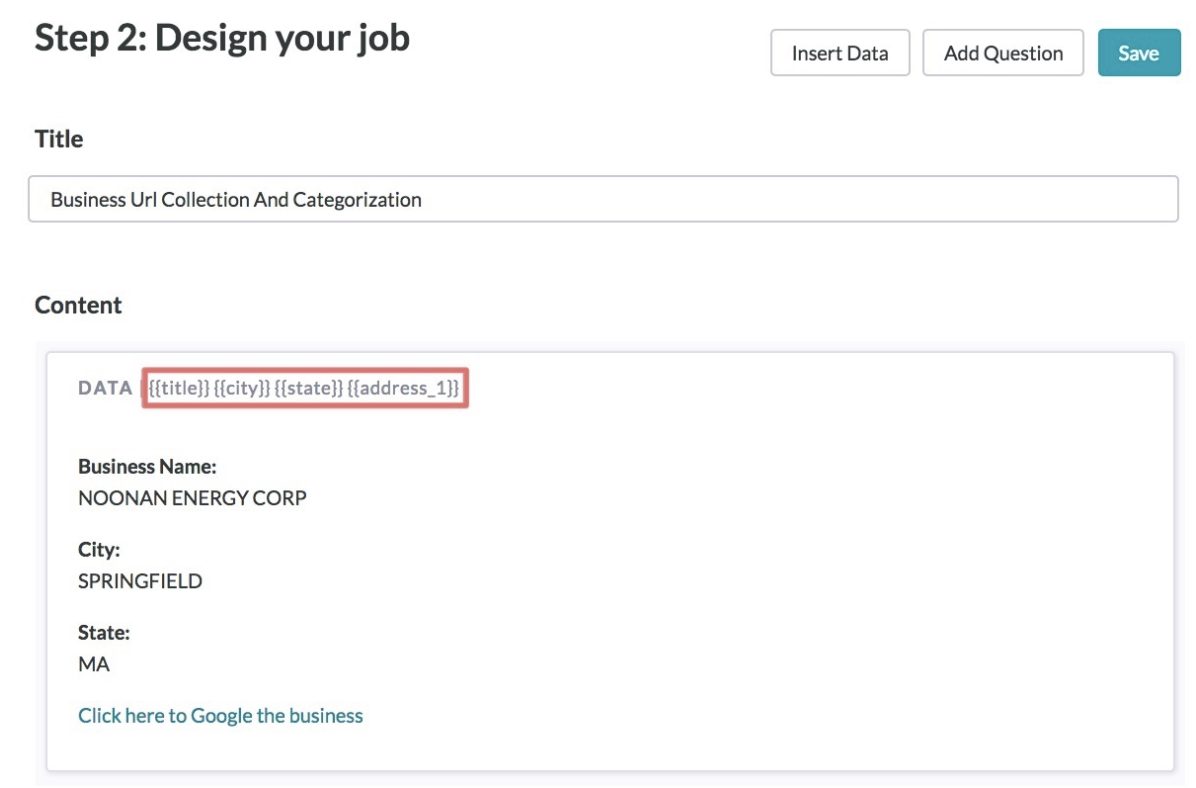
Fig. 3: Inserting the form elements to create your job
To create a job, visit the Design page. There you’ll find two editors available for creating the job:
- The Graphical Editor is best suited for simple jobs that do not contain complex features like logic, custom formatting, or JavaScript – such as the job displayed above.
- The Code Editor allows you to use code to implement special contingencies (logic, HTML, JavaScript, and CSS) in your form. We recommend reading our CML documentation before using the Code Editor.
In this job we will show contributors a Business Name and a Business Website that they will use to categorize the business. We show the possible categories as radio buttons which will allow contributors to only select one category for a business. The results from 3 trusted contributors will be aggregated together to result in the most confident category chosen.
Create Test Questions
After the job has been written, you will need to convert some of your uploaded rows to training rows called Test Questions. By saving the correct answers to a small set of rows, we can set an accuracy threshold and ensure that only contributors that can perform above that threshold on Test Questions can enter the job. We calculate the quality of a contributor's performance and reject them if their accuracy drops below a defined threshold (70% by default). This ensures high quality responses to all of your questions and pages.
You can create Test Questions individually by using the Test Question interface (shown below), or in bulk via a data file. One test question will be included in each page in your job by default.
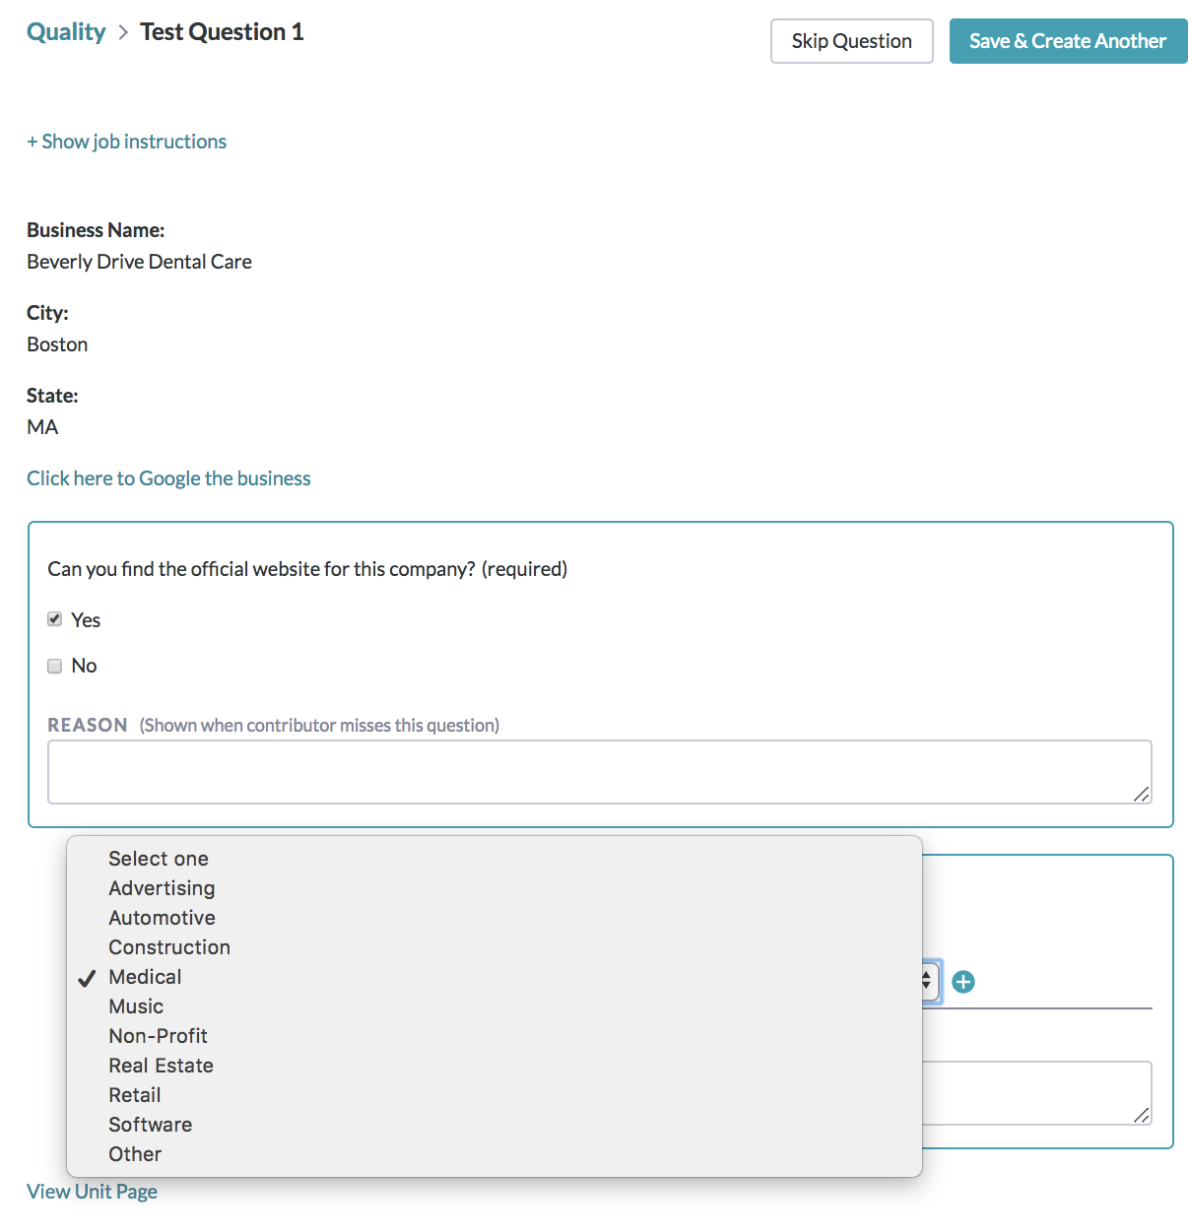
Fig. 4: Creating test questions in the test question interface
Note: You can save more than one response for each question in the job.
When creating Test Questions, you should absolutely ensure that you have accounted for all possible correct responses. Otherwise, you risk penalizing quality contributors who submit acceptable responses. A Test Question reason will be displayed when a contributor misses a Test Questions row, helping to train contributors. Visit the How-to Create Test Questions article to learn how to create Test Questions and the Test Question Best Practices article explains the characteristic of great test questions.
Calibrate Settings
After you have created Test Questions and are confident they are accurate, you will need to calibrate the settings for the job.
Click on Settings in the right navigation sidebar and be sure to designate the number of rows you would like on each of your pages. This is the number of rows that a contributor must complete before they are paid. Try to refrain from a high number of rows per page, as this can lead to contributor fatigue, negatively impacting accuracy.
Designate the amount per page you wish to pay. There are no minimums when setting pay, but note that contributors will not agree to work on your job if the pay is too low. Running jobs on Appen is often an iterative process. You may need to adjust pay several times when starting a project.
Specify the number of judgments you would like to collect for each row under the Judgments tab. You will likely need to collect a minimum of 3 judgments and no more than 7 judgments per page.
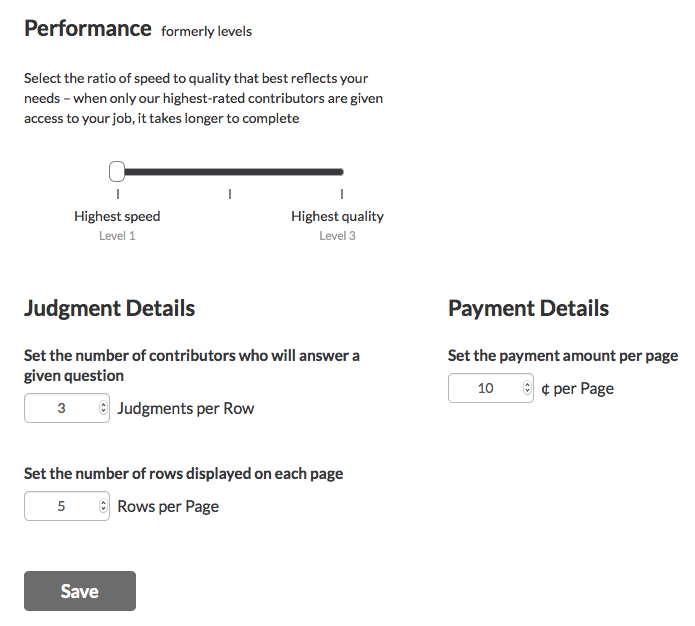
Fig. 5: Calibrating your job
Launch your Job
When you have adjusted your settings appropriately, click Launch on the left navigation panel. From this page, you can also specify the number of rows from your entire dataset you would like to order. You will be prompted with the cost of the job you wish to run and an option to add credits if you lack sufficient funds in your account to cover the amount displayed.
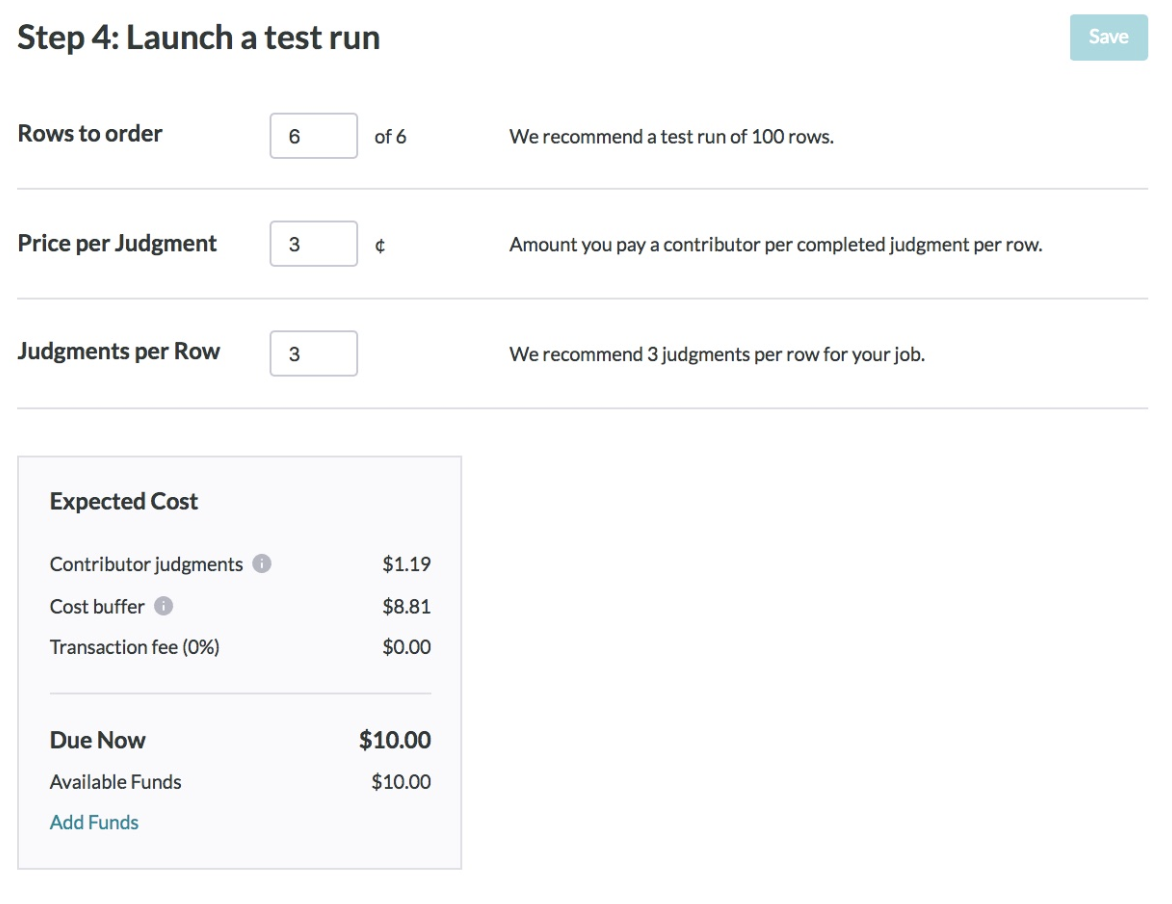
Fig. 6: Launch your job
Obtain Judgments
From the moment you launch your job, you can use the dashboard on the Monitor page to check on the status of your job and quantify the number of judgments rendered. Judgments on each row can be further segmented into trusted and untrusted judgments – those judgments that have been submitted by trusted or untrusted contributors.
Note: By default, a contributor must see a certain number of Test Questions before the system evaluates his or her accuracy. This number is set by the number of Rows per Page. Contributors who have seen that many Test Questions and whose accuracy falls below 70% will be removed from the job and their judgments will be discarded and converted to untrusted. Only trusted judgments (from contributors with an accuracy of 70% or higher) will be included in the job's results.
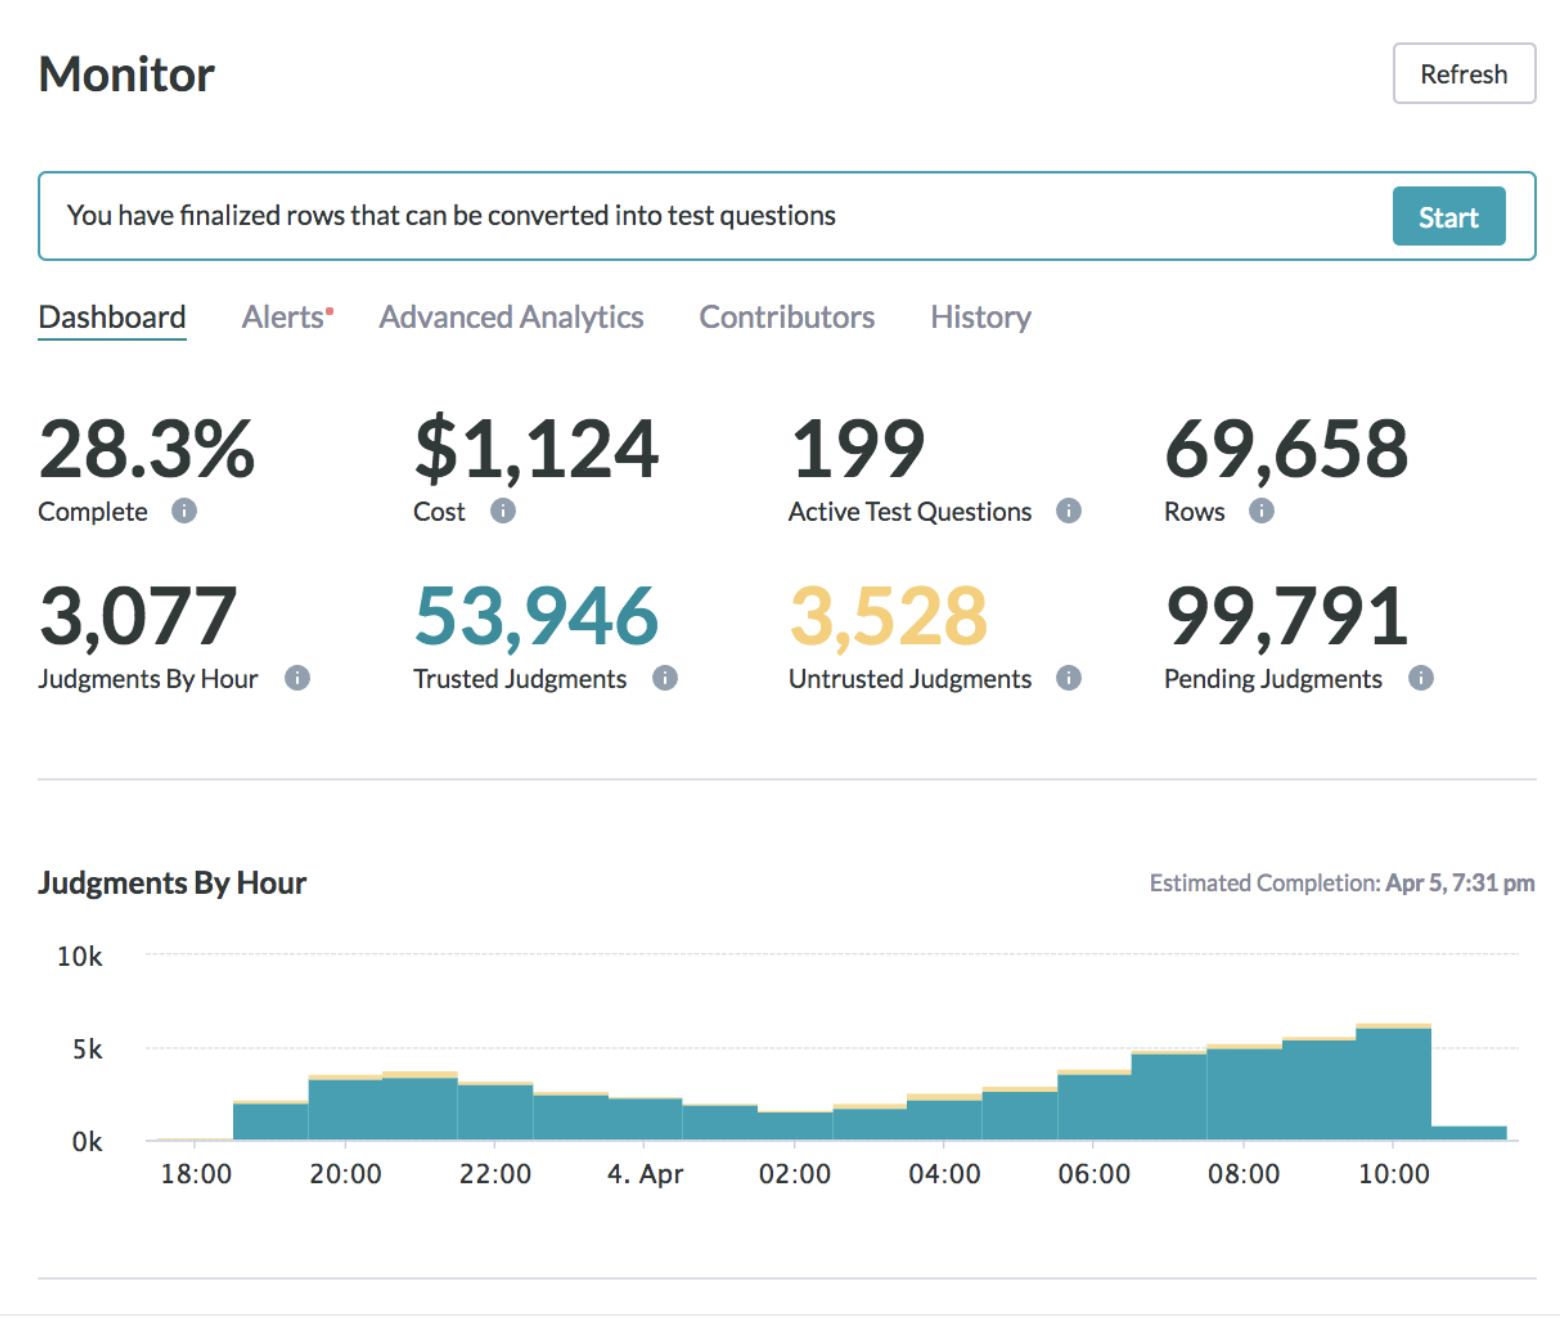
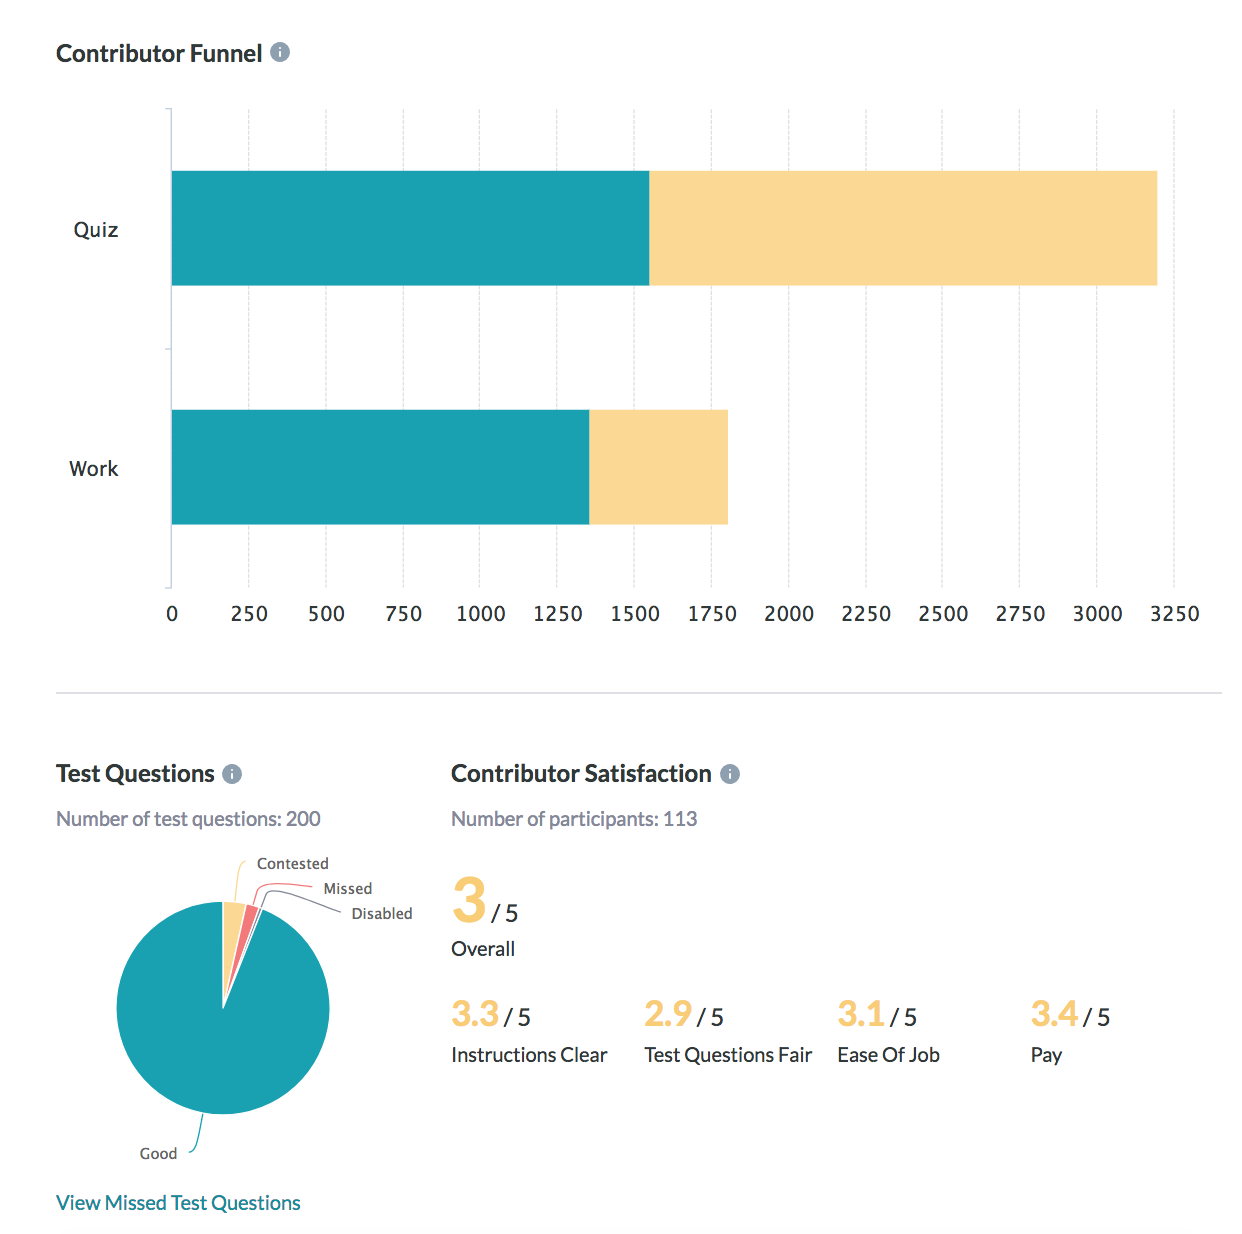
Fig. 7: Monitor the status of your job
Tip: The Active Contributor tab on the Contributors page provides performance information on each contributor in the job.
In the example below, we can tell that an untrusted contributor (in red) was automatically stopped after seeing four Test Questions. If the job author who wrote the Test Questions made an error while designating the acceptable answer(s) to a test question, they can retroactively forgive a missed response to a Test Questions row by changing the answer in the interface. This will immediately raise the contributor's accuracy. If the contributor entered a correct response and was marked incorrectly, be sure to save the response in the Test Question (on the Test Questions page) so other contributors won't be penalized as well.
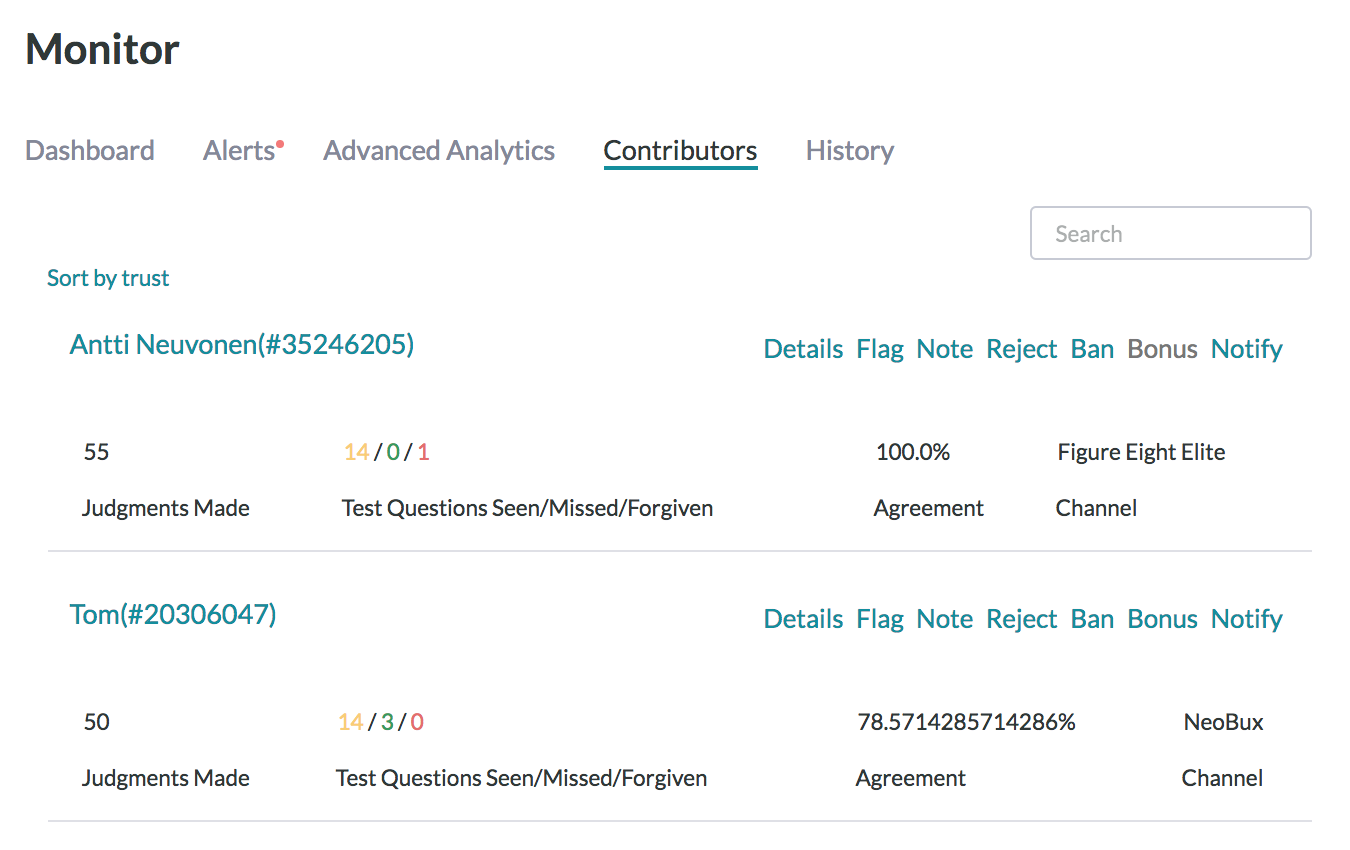
Fig. 8: Review the performance of active contributors
Retrieve and Interpret your Results
While you might wait until you job is completed to review your job’s results, you can generate and download your results at any time by navigating to the Reports page.

Fig. 9: Generate and download your reports
There are six reports to choose from:
Full
This report includes every judgment made by every contributor. It contains (among other things) contributor IDs, trust rating, labor channel, and contributor judgments. You'll use this CSV to dive deeply into the data to understand patterns (e.g., maybe all contributors from a specific region are providing poor responses, but you wouldn't be able to tell that from the Aggregated CSV).
Aggregated
The aggregated report includes one result for every row. Since multiple contributors answer each row, the aggregated CSV aggregates contributor's judgments based on individual contributors' trust ratings. This CSV is what you are likely to interact with the most.
Source
This is the original source data from the data file you uploaded earlier.
Test Question
The Test Question report includes data on the responses gathered by your Test Questions.
contributor
This report includes data on the contributors who participated in the job.
Json
The Json report is a JavaScript Object Notation format for the aggregated report.
Note: By default, the results in the aggregated report contain the response that the system has determined to be correct, based on contributor agreement weighted by trust. See the How to Calculate a Confidence Score article to learn more about aggregation. A confidence score is included with every field in the form. This numerical value indicates how confident you can feel that the result is correct.
In under an hour we have obtained a list of categorized companies. And without scrutinizing every response submitted in the job, our job’s accuracy is ensured thanks to the savvy use of Test Questions and a thoughtfully designed job.
This tutorial only highlights the basic features provided by the Appen Basic product. For more information on the features available to you, please visit our success center or email us directly at help@figure-eight.com. If you don't have an account, you can sign up now.