

This tutorial will describe how to verify or correct a business address. Step 1 (Find Official URL) is available here.
Build the Job
You can create a job from scratch, or you can use this template:
Business Address Correction (Advanced)
Upload Data
You should upload the data from Step 1 - Find an Official URL that contains official URLs. If you already have a list of business with official URLs, you can skip Step 1. The source data should include columns titled website (official website from Step 1), address_line_1, city_name, state_or_province_name, postal_code, country_code, and business_name. If you only have the business name and some combination of the other address information, the job will automatically populate with the data provided, but make sure the columns are named appropriately.
Note: CSVs need to be UTF-8 encoded
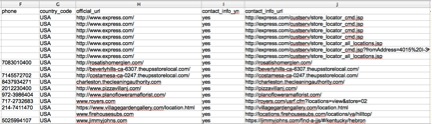
Your data should look like this:

Data continued:
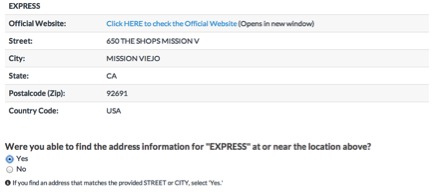
When you load the source data into the job, the job preview will look like this:
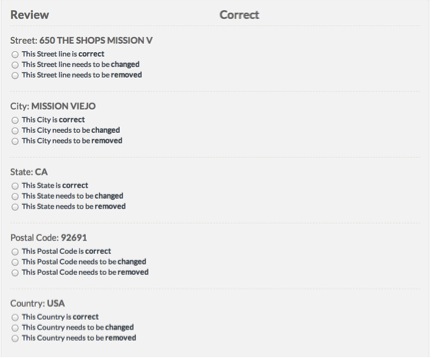
The form to verify, change, or remove each element:
Check the Job Structure
In this job, we will show contributors the Business Name, website, street address, city, state, postal code, and country code, along with a link to the official website. Contributors will visit the website and determine if they were able to find address information for the business. If they find address information, they will be presented with the form to verify, correct, or remove each part of the address.
Create Test Questions
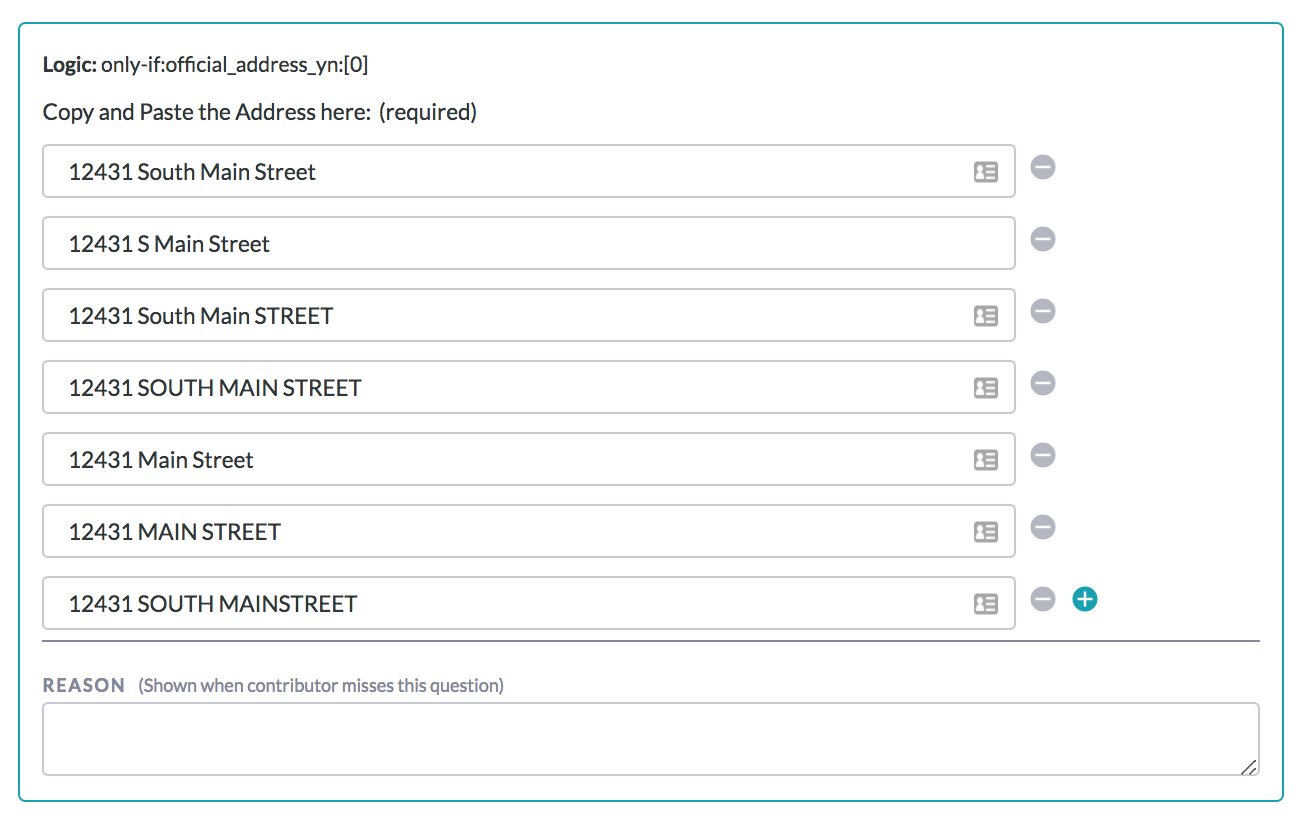
Next, create Test Questions for your job. When creating Test Questions, you should ensure that you have accounted for all possible correct responses. Otherwise, you risk penalizing quality contributors who submit acceptable responses. This is especially relevant to address jobs. If you create a Test Question with one variation of an address as an answer, contributors may input slightly different, but still address components. One way to adjust for this is to add address components to the acceptable answers as the job is running. If the row is an ‘edge case,’ or is different in some way and potentially unfair, you can choose to not input any information into that field of the Test Question. When a contributor misses a Test Question, the reason will be displayed, explaining why the person missed that question. When creating the reasons, make sure to explain the reasoning for that answer. For more information on Test Questions, visit Test Question Best Practices and How-to Create Test Questions.
Note: You can save more than one response for each question in the job.
Creating test questions in the test question interface
Check the Job Settings and Launch
Check the settings under the Contributors and Job Settings tabs. For this job, we recommend a minimum accuracy between 70 and 75, a page size of 6, a price of $.10-$.12 per 6 rows, and 3 judgments per row. After the settings have been adjusted, launch your job.
Monitor the Job
While the job is running, be sure to monitor the Test Questions and add acceptable answers as needed.
Monitor the status of your job
Download the Results
When the job is complete, review the results with the aggregated report.
Generate and download your reports
How to calculate confidence score
Utilize the Data
This job will produce corrected addresses for businesses. You may update your existing business list or collect more data using the business addresses.