

This tutorial will describe how to verify or correct a business phone number. Step 1 (Find Official URL) is available here and Step 2 (Verify or Correct an Address) is available here.
Build the Job
You can create a job from scratch, or you can use this template:
Business Phone Number Collection (Advanced)
Upload Data
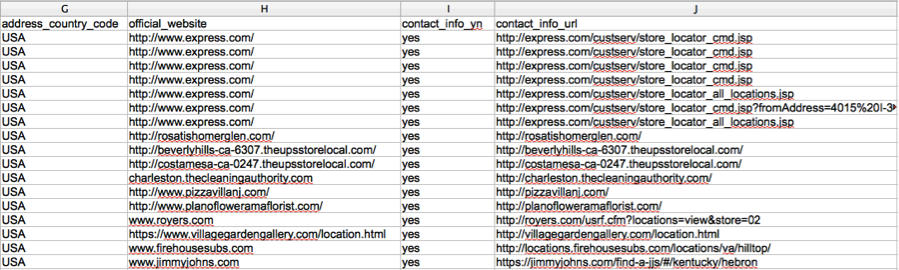
You should upload the data from Step 1 (Find URL) that contains official URLs. The source data should include columns titled official_website (official website from Step 1), phone_number, address_street, address_city, address_state, address_postal_code, address_country_code, and name. If you only have the business name and some combination of the other address information, the job will automatically populate with the data provided, but make sure the columns are named appropriately.
Note: CSVs need to be UTF-8 encoded
Your data should look like this:

Data continued:
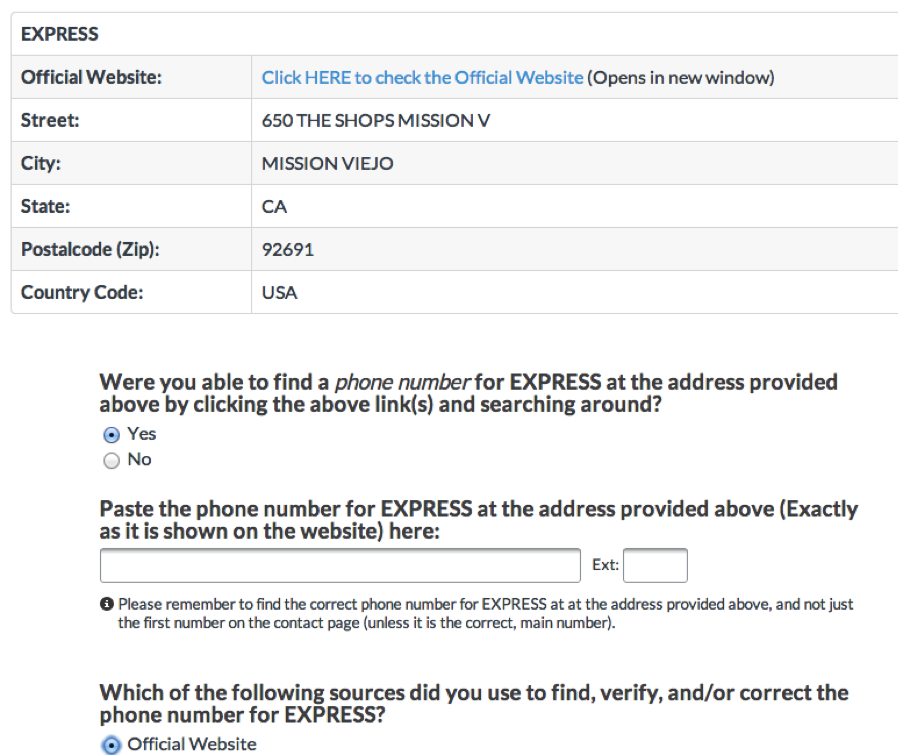
When you load the source data into the job, the job preview will look like this:
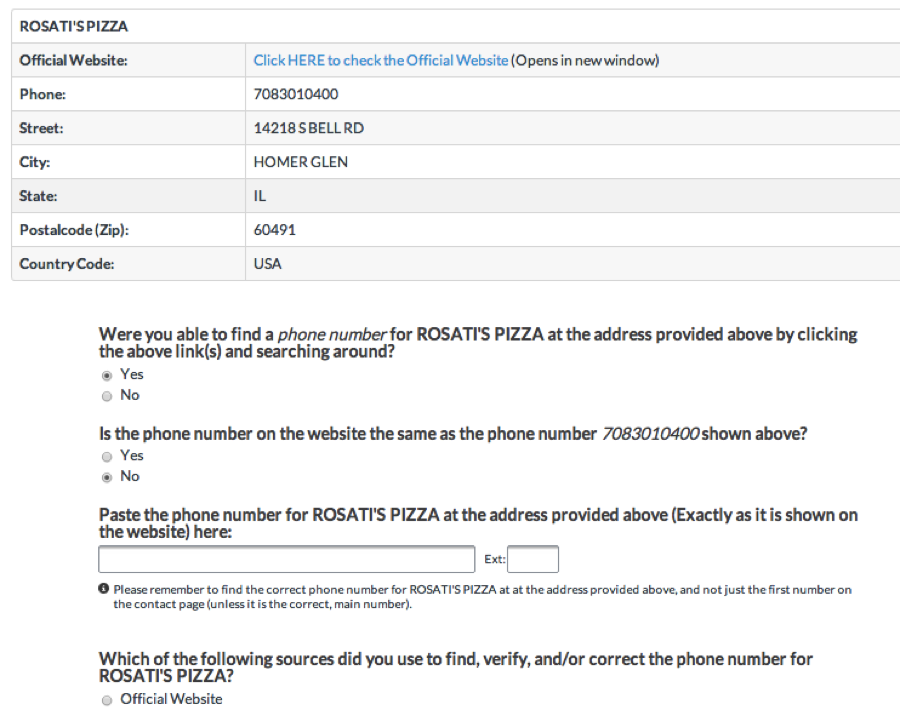
If there is a phone number in the source data, the job will adjust:
Check the Job Structure
In this job, we will show contributors the Business Name, website, phone number, if available, street address, city, state, postal code, and country code. Contributors will visit the website and determine if they were able to find a phone number that matches the location. If they find a phone number, they will either enter it into the page or compare it to an existing phone number, if there is one.
Create Test Questions
Next, create Test Questions for your job. When creating Test Questions, you should ensure that you have accounted for all possible correct responses. Otherwise, you risk penalizing quality contributors who submit acceptable responses. If the row is an ‘edge case,’ or is different in some way and potentially unfair, you can choose to not input any information into that field of the Test Question. When a contributor misses a Test Question, the reason will be displayed, explaining why the person missed that question. When creating the reasons, make sure to explain the reasoning for that answer. For more information on Test Questions, visit the Test Question Best Practices and Test Questions Creation Page articles.

Note: You can save more than one response for each question in the job.
Check the Job Settings and Launch
Check the settings under the Job Settings tabs. For this job, we recommend a minimum accuracy between 70 and 75, a page size of 8, a price of $.03-$.05 per 8 rows, and 3 judgments per row. After the settings have been adjusted, launch your job. For more information, see these articles: Job Settings Page and Quality Control Settings.
Monitor the Job
While the job is running, be sure to monitor the Test Questions and add acceptable answers as needed. This article has more information about monitoring jobs: Monitoring Your Job.
Download the Results
When the job is complete, review the results with the aggregated report. These articles detail How to Download Results and How to Calculate a Confidence Score.
Utilize the Data
At this point, you will have obtained phone numbers for businesses. You can either use the results as they are, or continue to Step 3 to verify or correct the address for the business.
Note:
By default, the results in the aggregated report contain the response that the system has determined to be correct, based on contributor agreement weighted by trust. See the How to Calculate a Confidence Score article to learn more about aggregation. A confidence score is included with every field in the form. This numerical value indicates how confident you can feel that the result is correct.
This tutorial only highlights the basic features provided by the Appen Basic product. For more information on the features available to you, please visit our success center or email us directly at help@figure-eight.com. If you don't have an account, you can sign up now.