

When utilizing Appen’s Secure Data Access, your team maintains ownership and governance overall source data. The data that your team supplies never leave your servers. For added security, private buckets can be used while processing training data in Appen.
Your team serves the source data via secure URLs hosted in private buckets inside your cloud storage. The only data that is passed to Appen are the URLs for your private bucket, which will be assigned a unit ID. Corresponding annotations for the data can be downloaded from Appen and can subsequently be associated with source data via the unit ID.
- Secure content is rendered through signed URLs
- Signed URLs expire immediately after the content is rendered
- Your content is never stored or saved within Appen
- Content is rendered only to authenticated contributors and requestors with access to specific Appen tasks.
Note: For access to this feature, please contact your Customer Success Manager or Account Executive.
Note: This article is for the Appen cloud data annotation platform. For Dedicated customers, please refer to this article.
S3 Bucket Preparation
- Within S3, create a new bucket or locate an existing bucket.
- For image annotation, pixel-level semantic segmentation, and text annotation uses cases, the S3 bucket will need to be CORS configured.
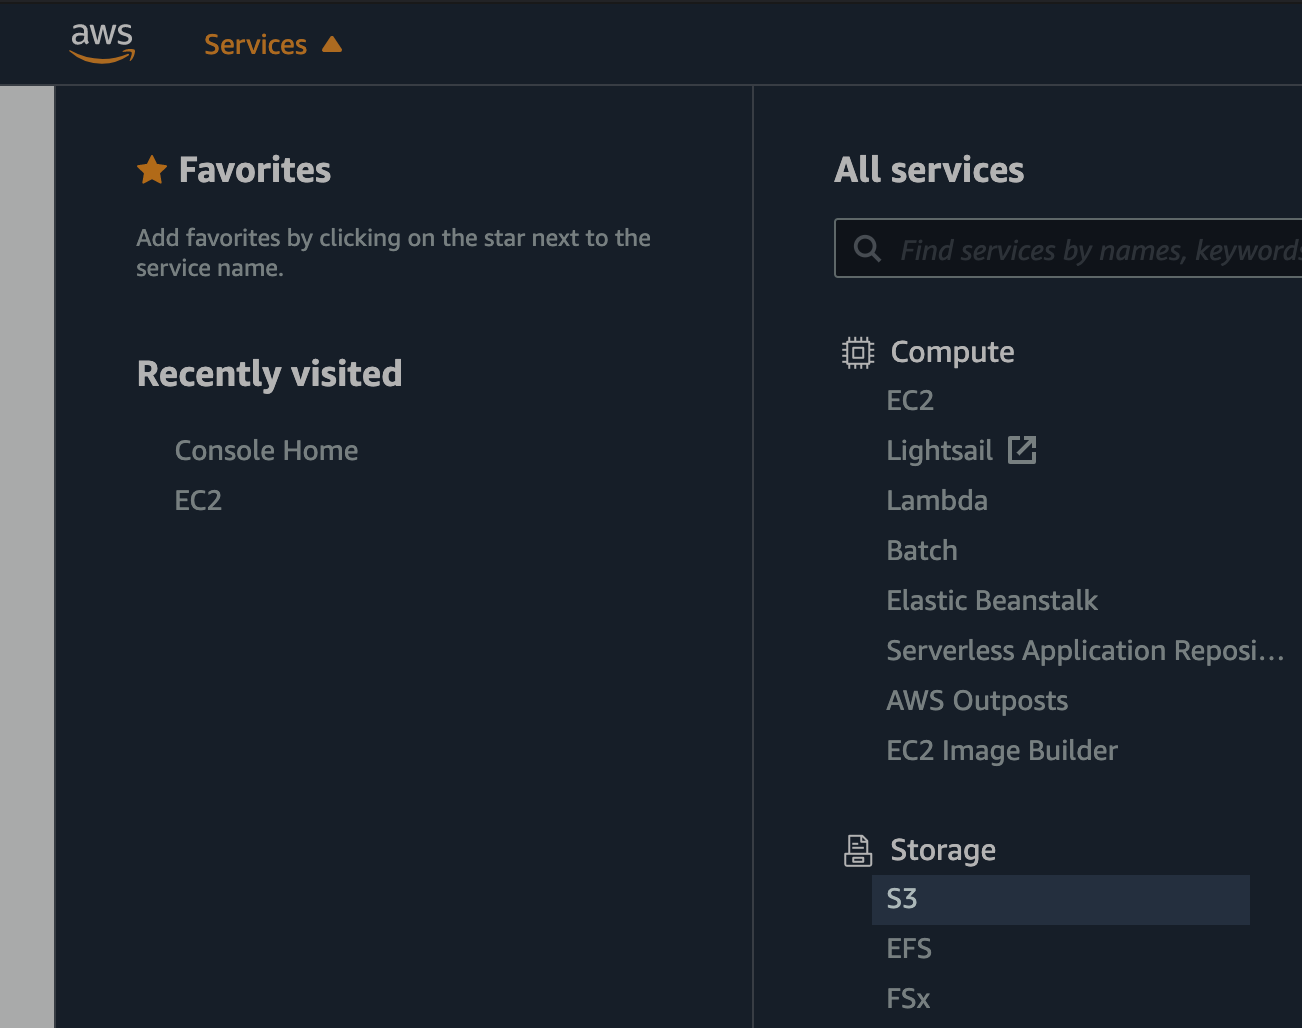
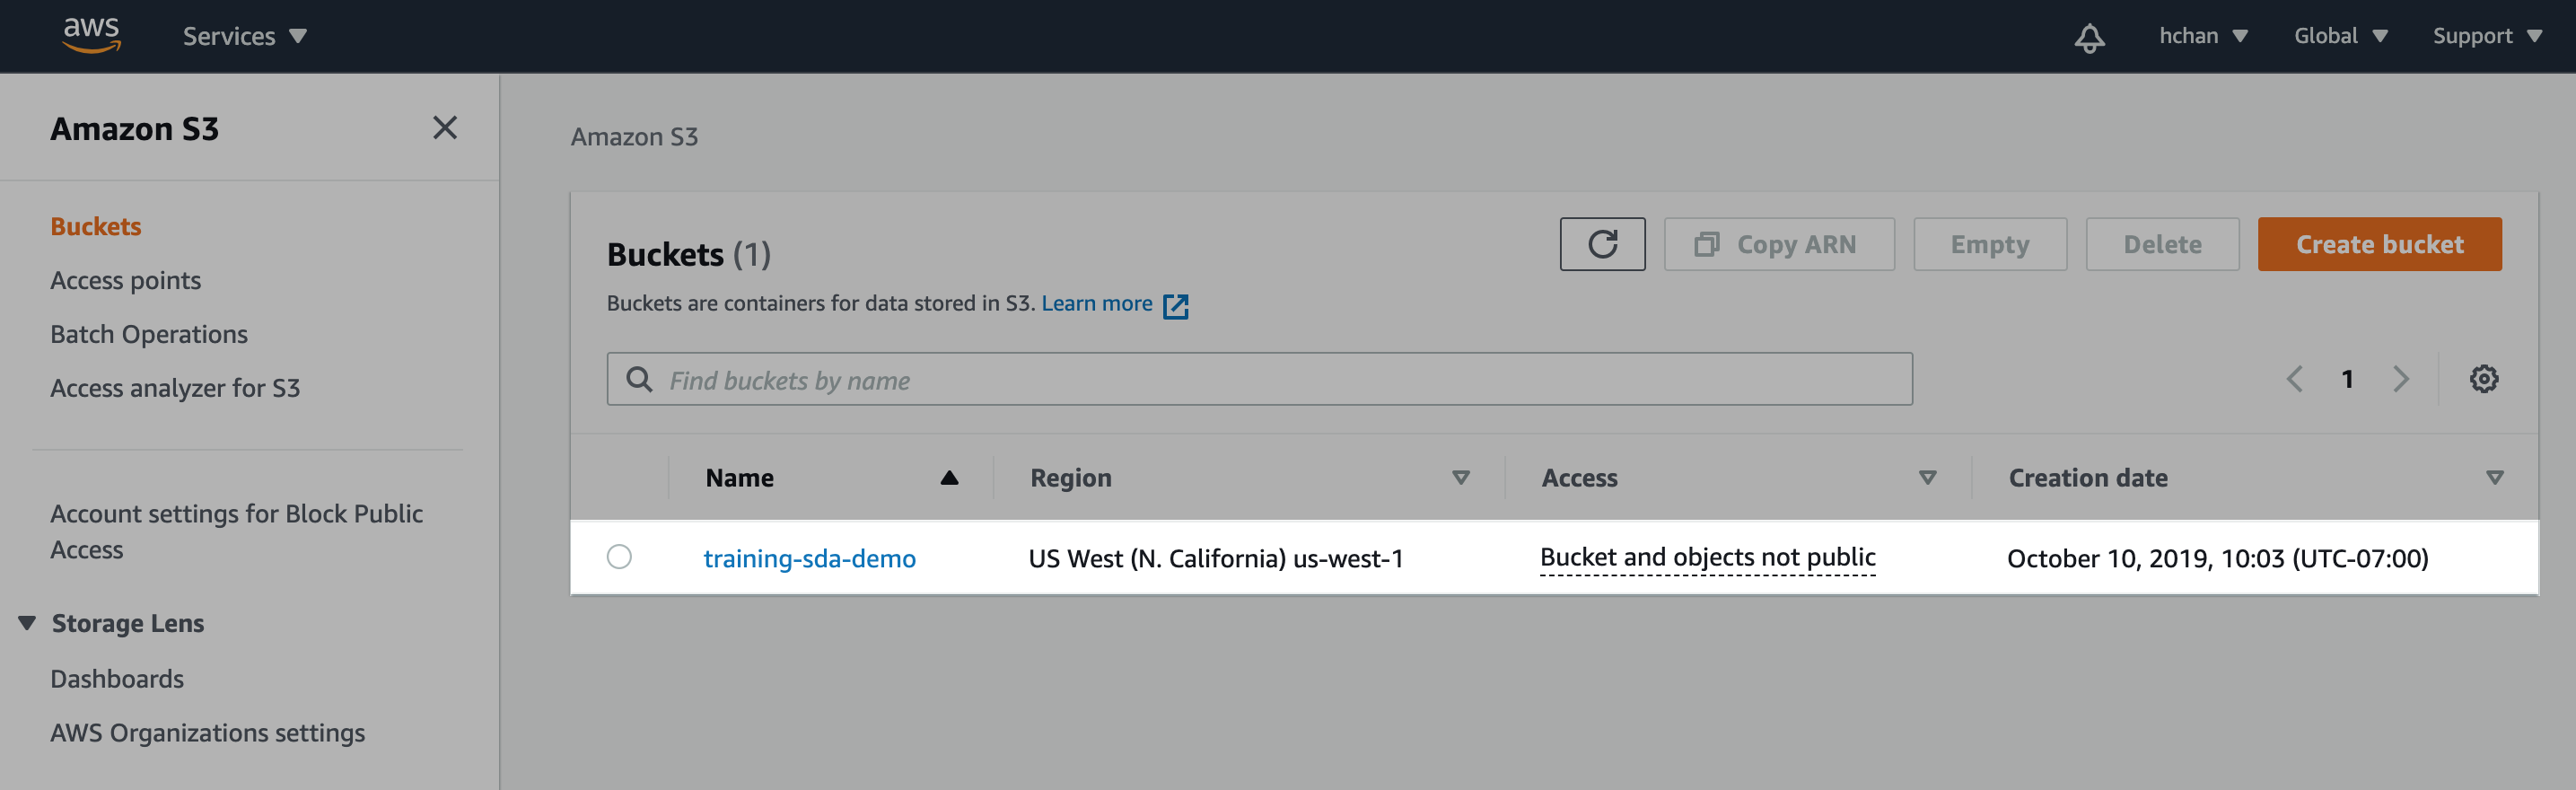
Figure 1. Create new/locate existing S3 bucket
Create IAM Policy
Figure 2. Find IAM dashboard
- Under Services, navigate to IAM dashboard, select "Policies" on the left and "Create policy"
Input JSON
- Within the JSON editor, copy, paste, and modify the JSON below:
{
    "Version": "2012-10-17",
    "Statement": [
        {
            "Sid": "AllowReadOnlyOperations",
            "Effect": "Allow",
            "Action": [
                "s3:GetObject",
                "s3:ListBucket"
            ],
            "Resource": [
                "arn:aws:s3:::s3BucketName",
                "arn:aws:s3:::s3BucketName/*"
            ]
        }
    ]
}
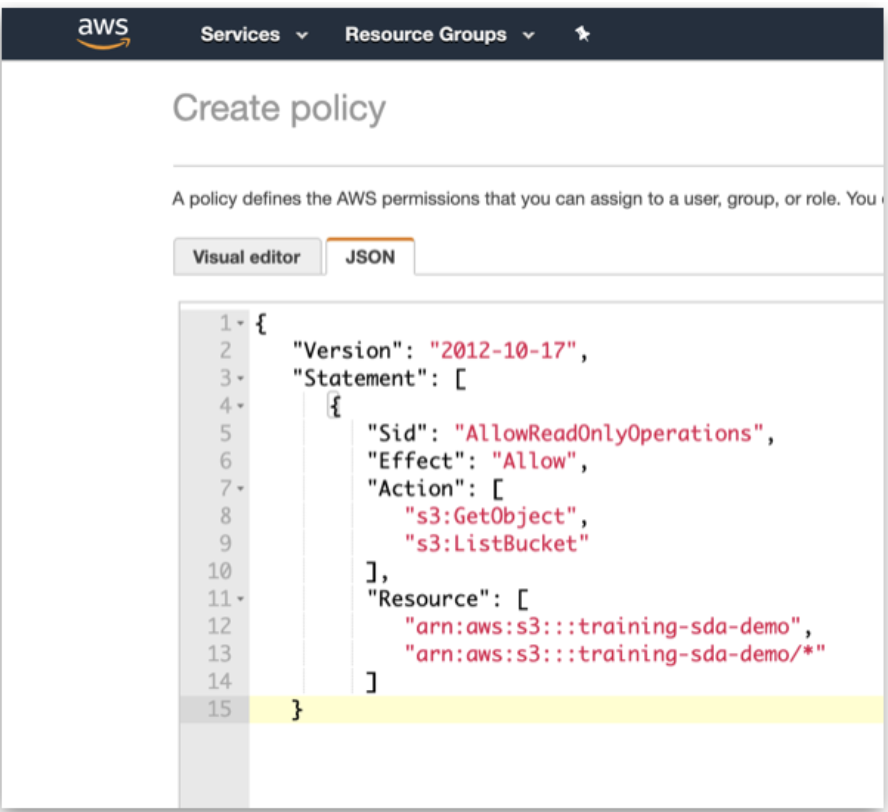
Figure 3. JSON Policy
- Name this policy to reference later when creating the IAM role.
- Click on "Create policy" when complete.
Create IAM Role
- Back on the main page of IAM, select "Roles" on the left and “Create role”.
- Select AWS service as type of trusted entity, S3 as the service that will use this role, and S3 as the use case.
- Move on to “Permissions” when complete.
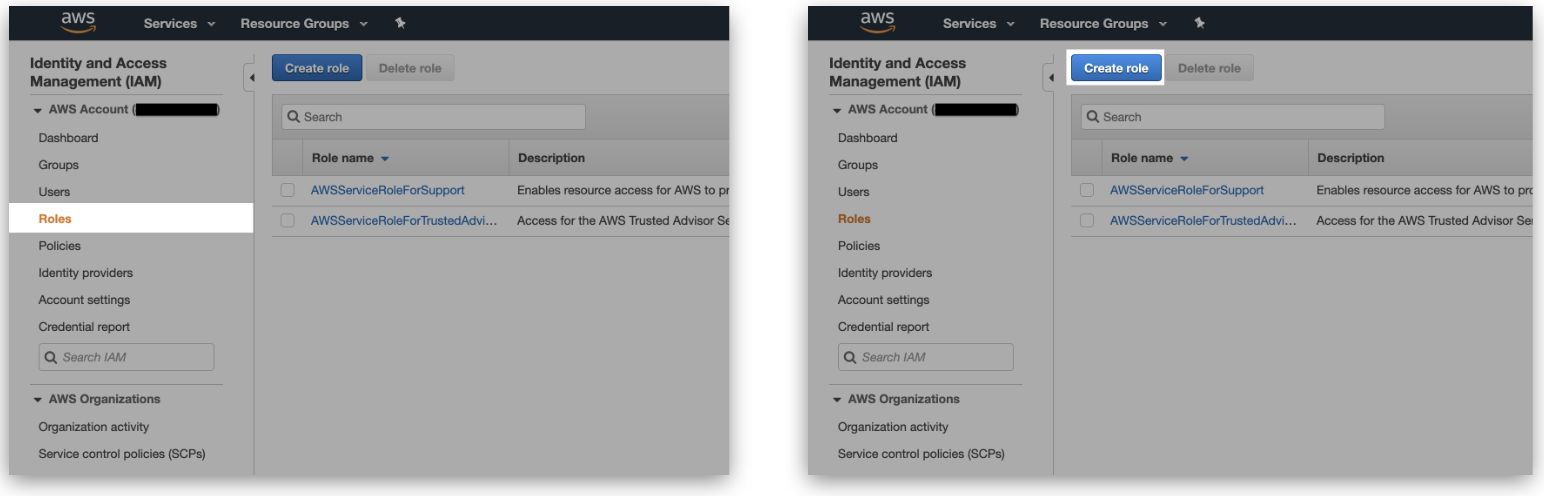
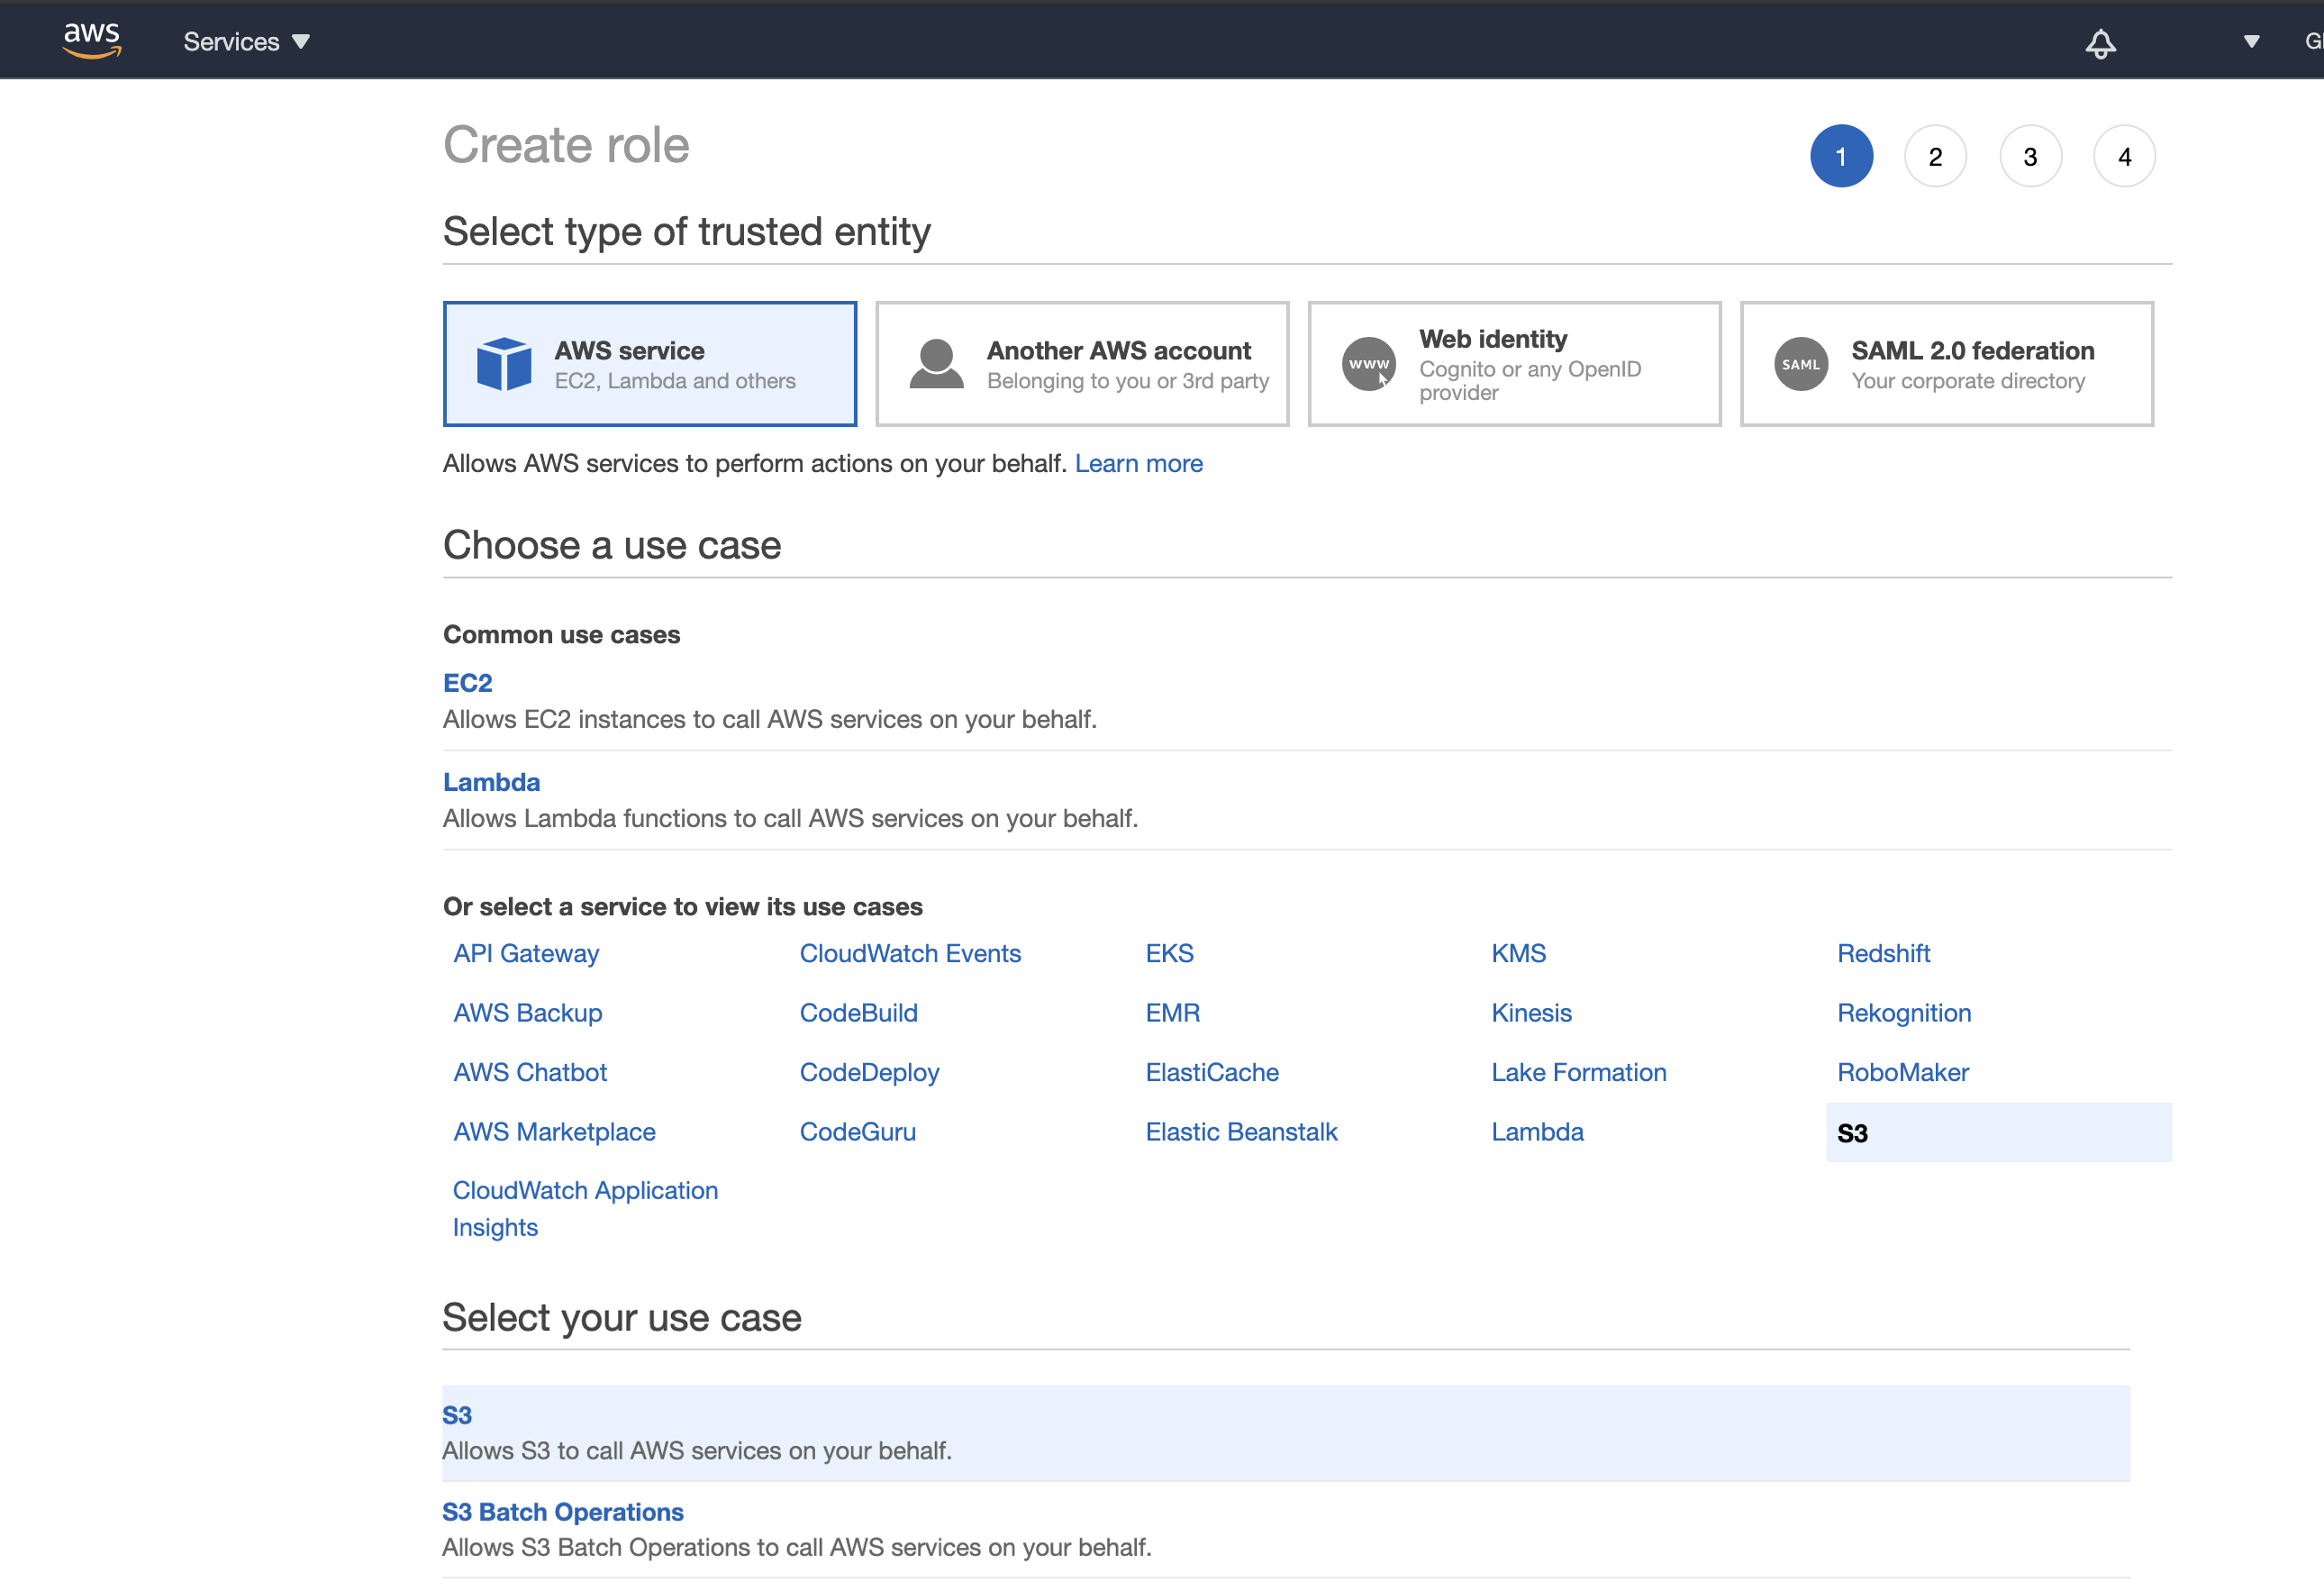
Figure 4. Create role
Link IAM Role to IAM Policy
- Under "Attach permissions policies", find the IAM policy name created in the previous step.
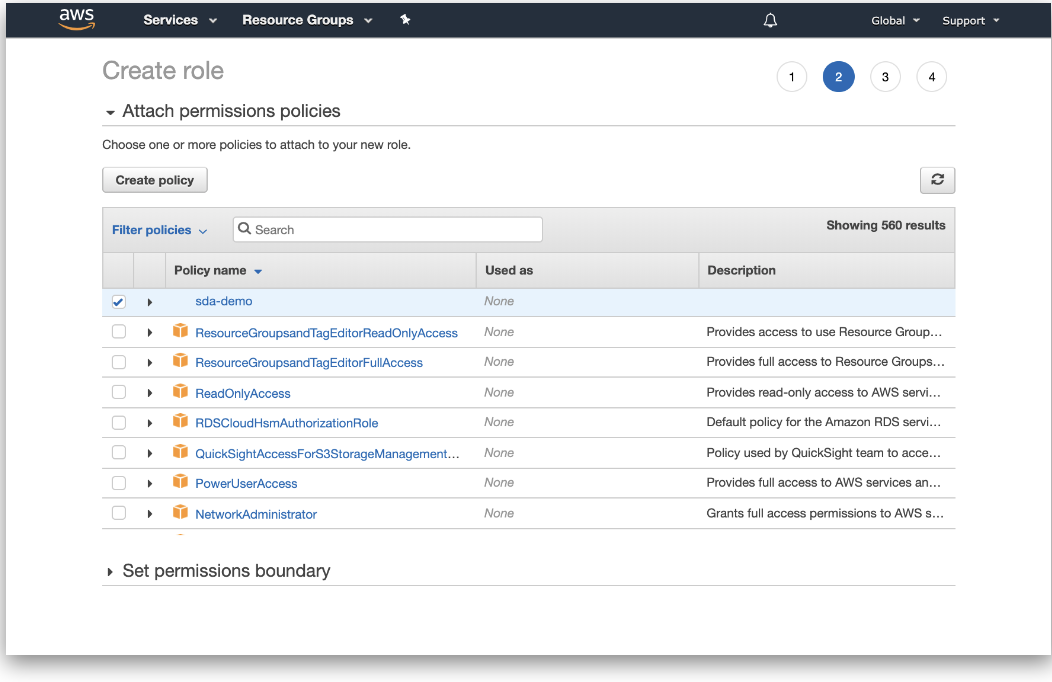
Figure 5. Attach permissions policies
- Name the IAM role, which will be referenced in Appen.
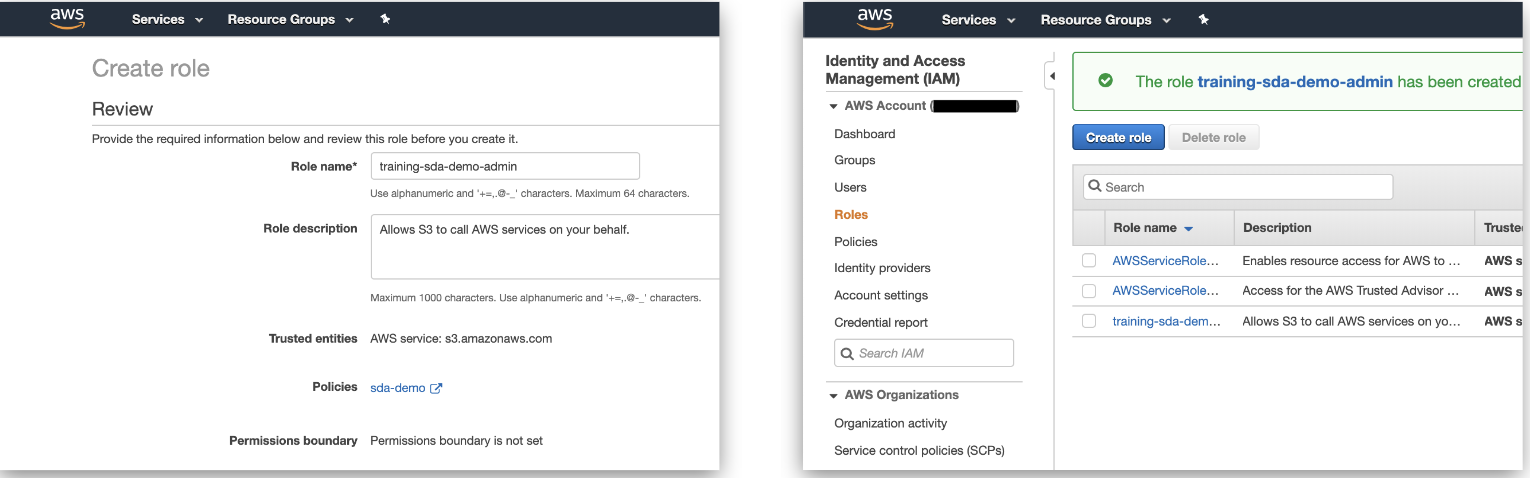
Figure 6. Name role
- 3. Select the IAM role and copy the Role ARN (AWS Resource Name).
- Note where the "Trust relationships" tab is as further configuration will be required at a later step.
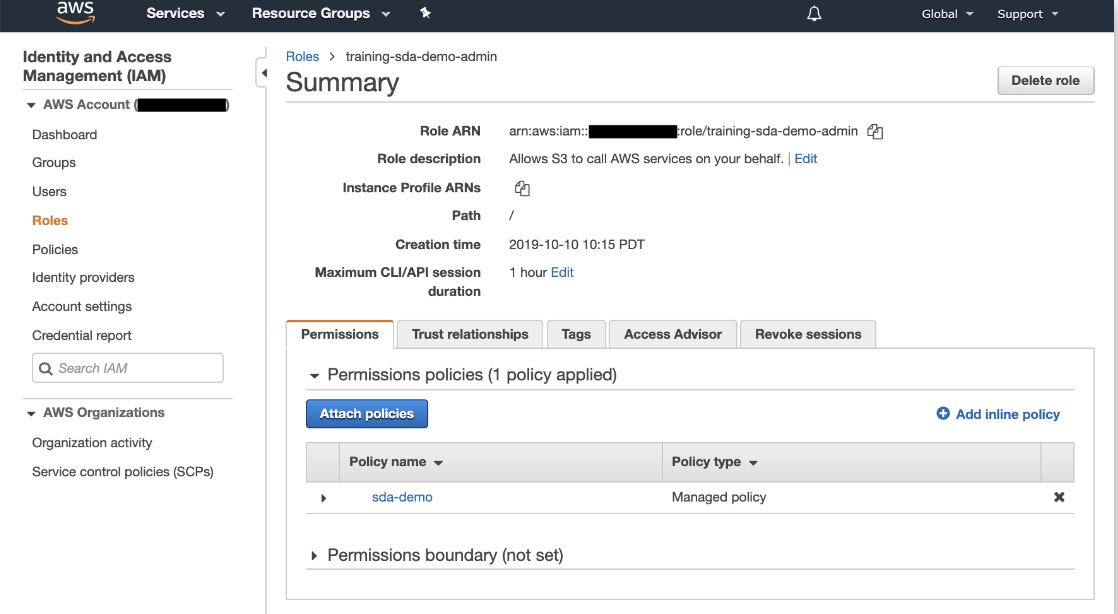
Figure 7. Role Summary
Data & Security in Appen
- In Appen, navigate to your Account Page --> Data & Security Tab.
- If you cannot find the Data & Security tab, please reach out to your Appen Customer Success Manager or Platform Support team.
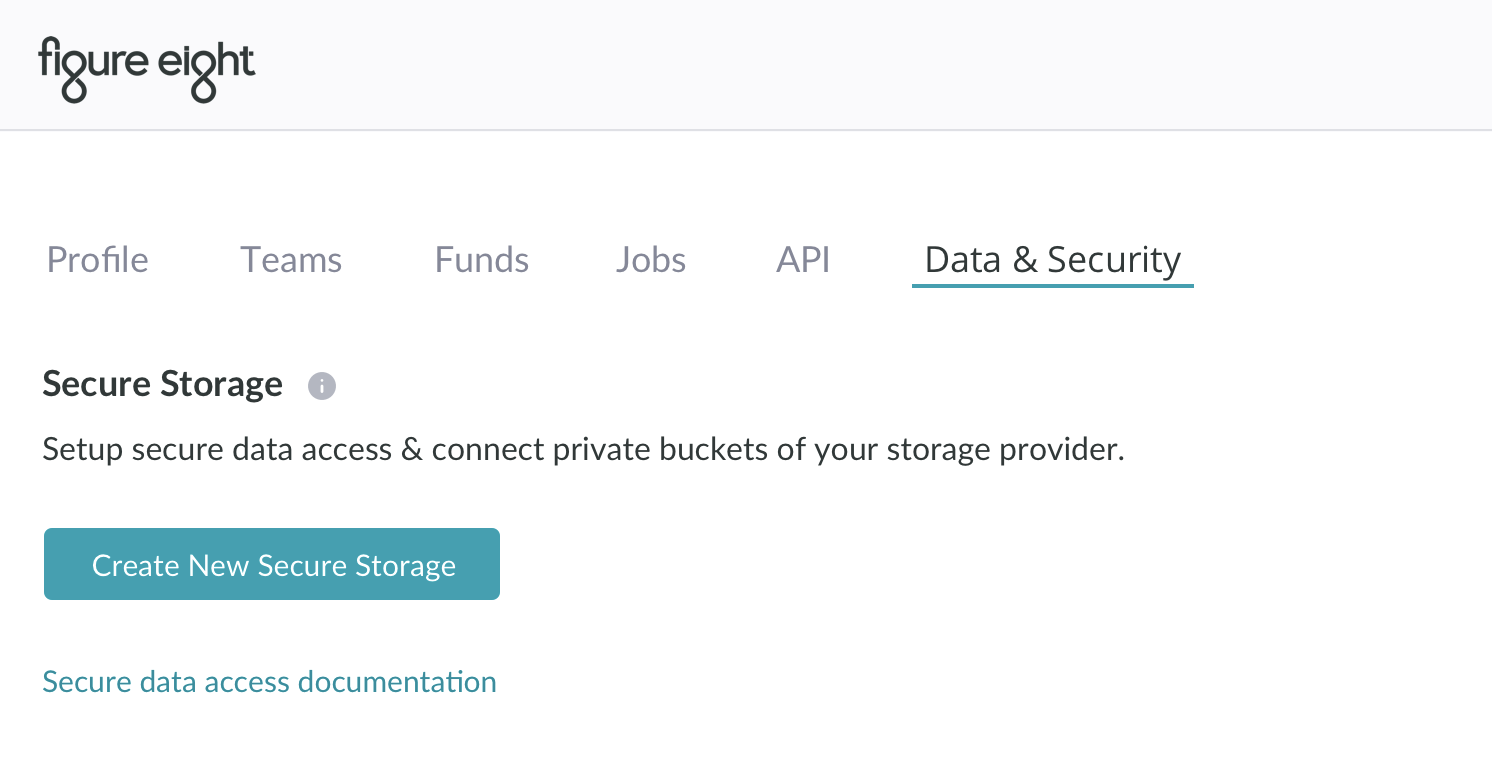
Figure 8. Data & Security tab
- Select "Create New Secure Storage"
- Input Storage CML Name, which will be used in the job's CML on the Design Page.
- There is a 10-character maximum limit for the Storage CML Name (only alphanumeric characters and underscores will be accepted).
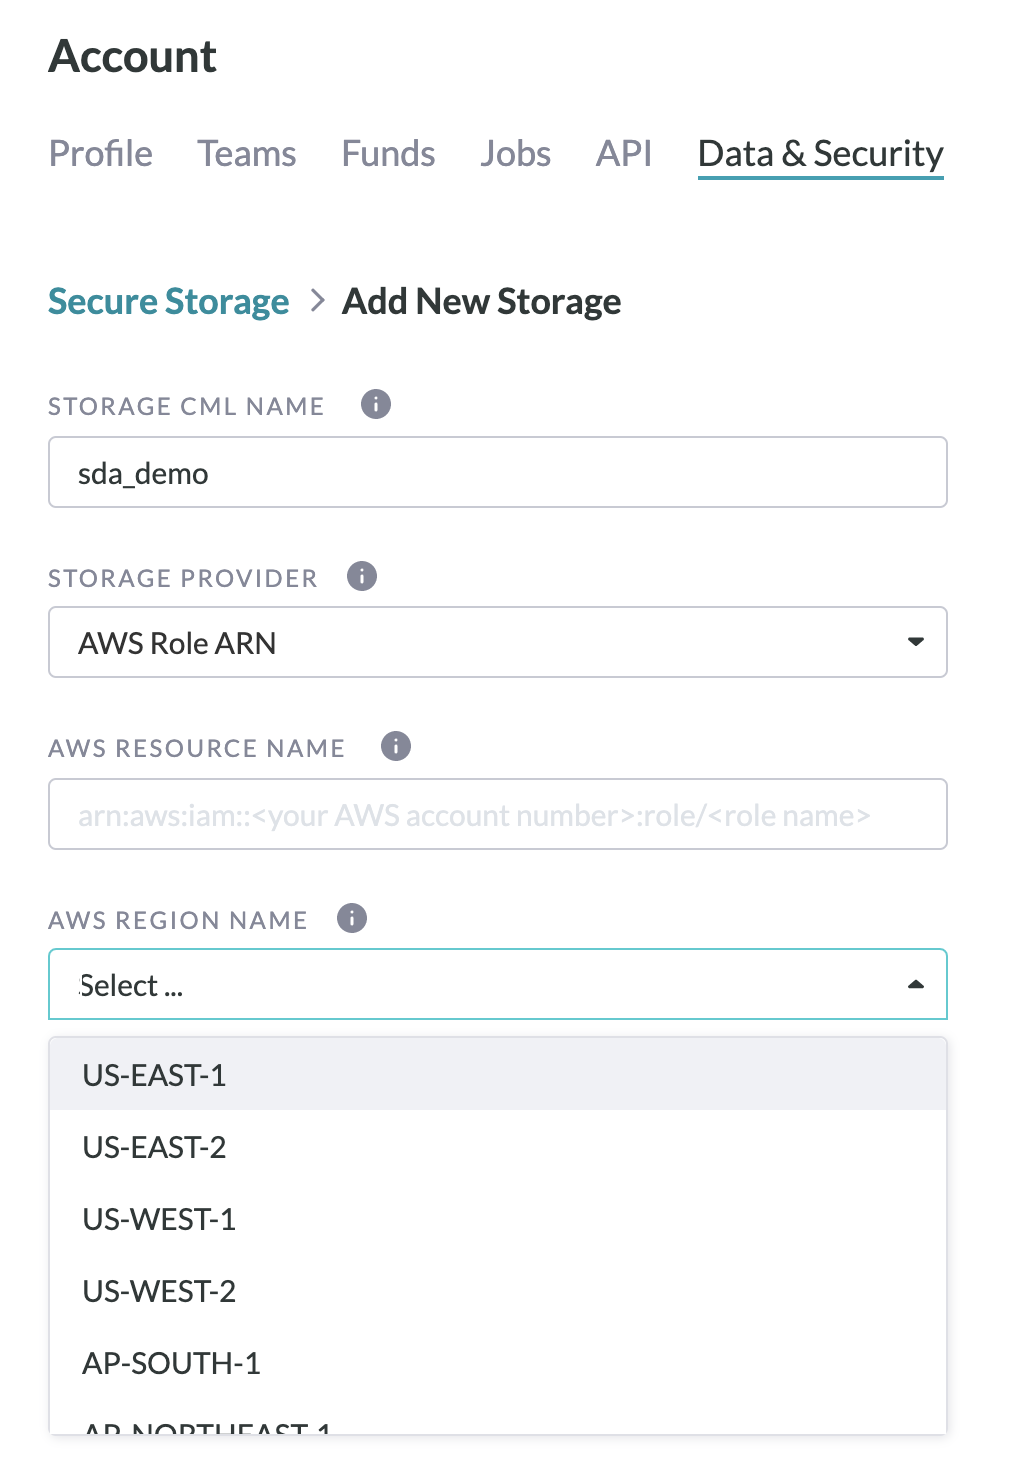
Figure 9. Add New Storage
- Paste your IAM Role ARN and select the AWS Region Name in which your bucket exists from the drop-down list.
- Select "Create".
- Now, on the Data & Security Page, you will see a status "Pending" under Secure Storage.
- Leave the Data & Security page open, as the AppenExternal ID and Appen account ID will be referenced in the next step.
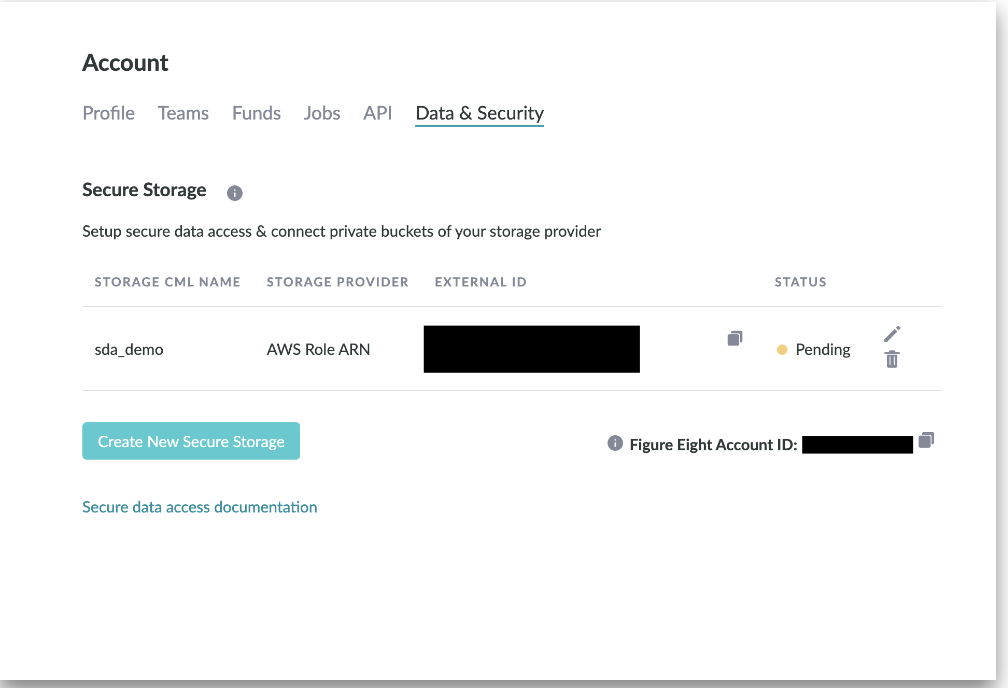
Figure 10. Pending Figure Eight Secure Storage
Update the IAM Role Trust Relationship
- In the "Trust relationships" tab, select "Edit trust relationship".
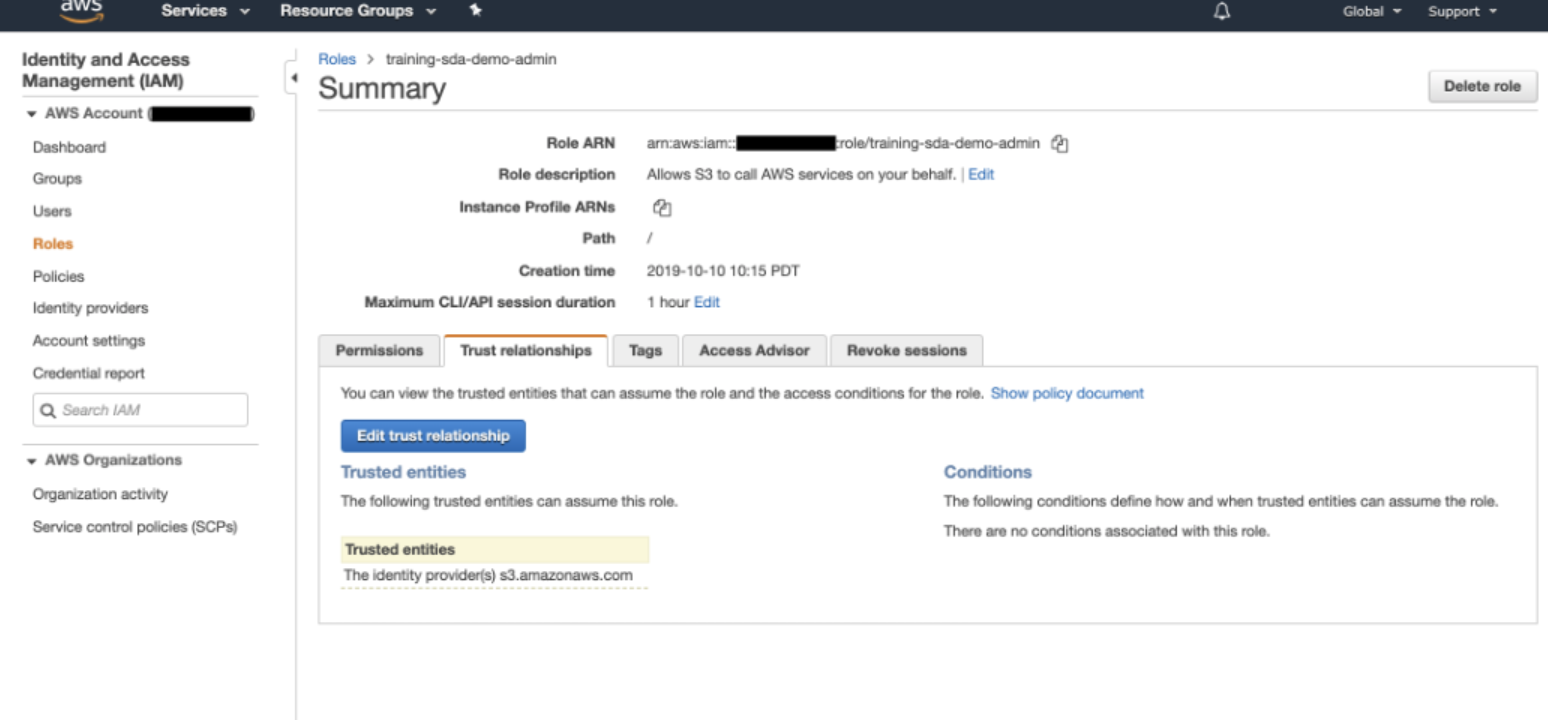
Fig 11. Edit Trust Relationship
- Within the Policy Document editor, input the following JSON:
- Modify the JSON with your respective Figure Eight Account ID and Figure Eight External ID.
{
   "Version": "2012-10-17",
   "Statement": [
      {
         "Effect": "Allow",
         "Principal": {
            "Service": "s3.amazonaws.com"
          },
         "Action": "sts:AssumeRole"
      },
      {
         "Effect": "Allow",
         "Principal": {
            "AWS": "arn:aws:iam::AppenAccountId:root"
         },
         "Action": "sts:AssumeRole",
         "Condition": {
            "StringEquals": {
               "sts:ExternalId": "AppenExternalId"
            }
         }
      }
   ]
}
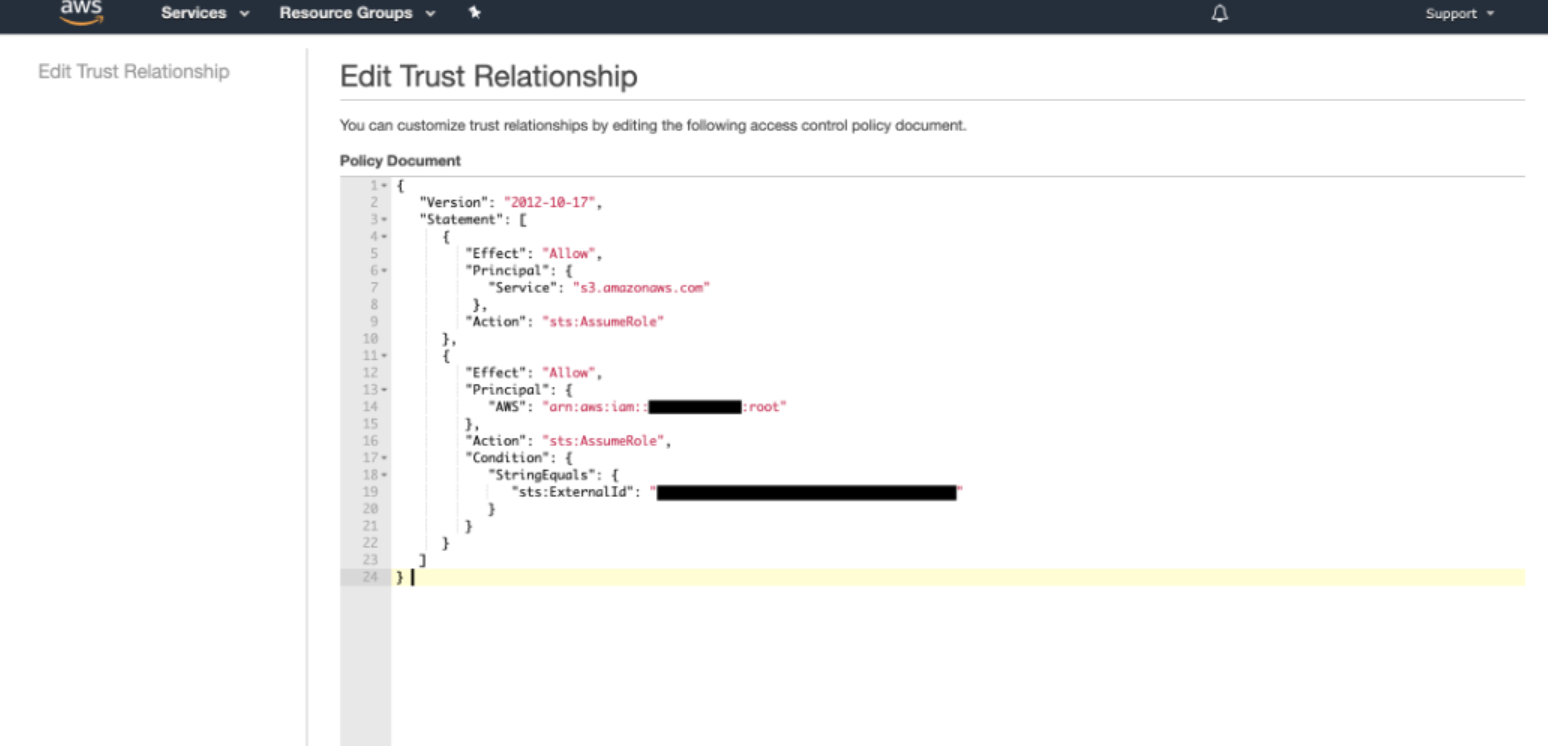
Figure 12. Edit Trust Relationship JSON
- Under "Trusted entities", you should see the Appen Account ID and under "Conditions" you should see the Appen External ID.
Notify Appen
- Notify your Customer Success Manager that the setup is complete.
- At this point, the Appen DevOps team will set the Secure Storage to 'Active' in the backend.
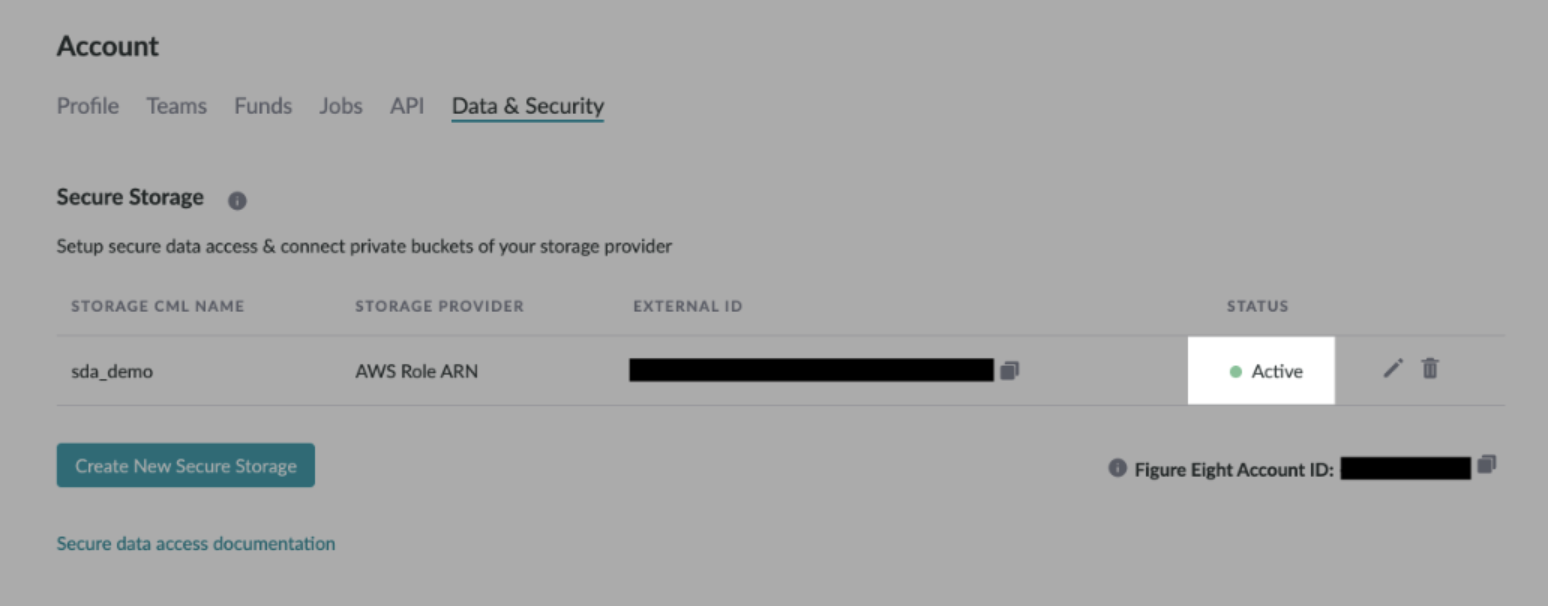
Figure 13. Active Appen Secure Storage
Upload Data with Secure Data Access Links
- To use SDA hosted links, upload a CSV or URLs in the following format:
s3://s3BucketName/bucketFilePath/fileName.fileType
Finishing Touch in CML
- As a final step, navigate to your job's Design Page and update your column references in liquid with the following format:
{{ columnName | secure: 'storageCmlName' }}- When using videos with Secure Data Access make sure to include the following tag in the CML section of your job:
preload="auto".
- For confirmation, you should see your hosted data within the Preview Page but not outside of Appen.
Additional Instructions:
- You can update or delete an existing storage integration
- Please note that changing the "Storage CML name" for a store provider will prevent any existing jobs that use that name in the CML from accessing private S3 content. So if value of "Storage CML Name" is modified the new value should be updated in the jobs accessing private data.
- Modifying AWS Resource Name or AWS Region Name will break the existing integration.
- The team can set up multiple storage provider integrations
- Team admins can add storage provider integration for their teams
- Org admins can add storage provider integration for all the teams within the Org