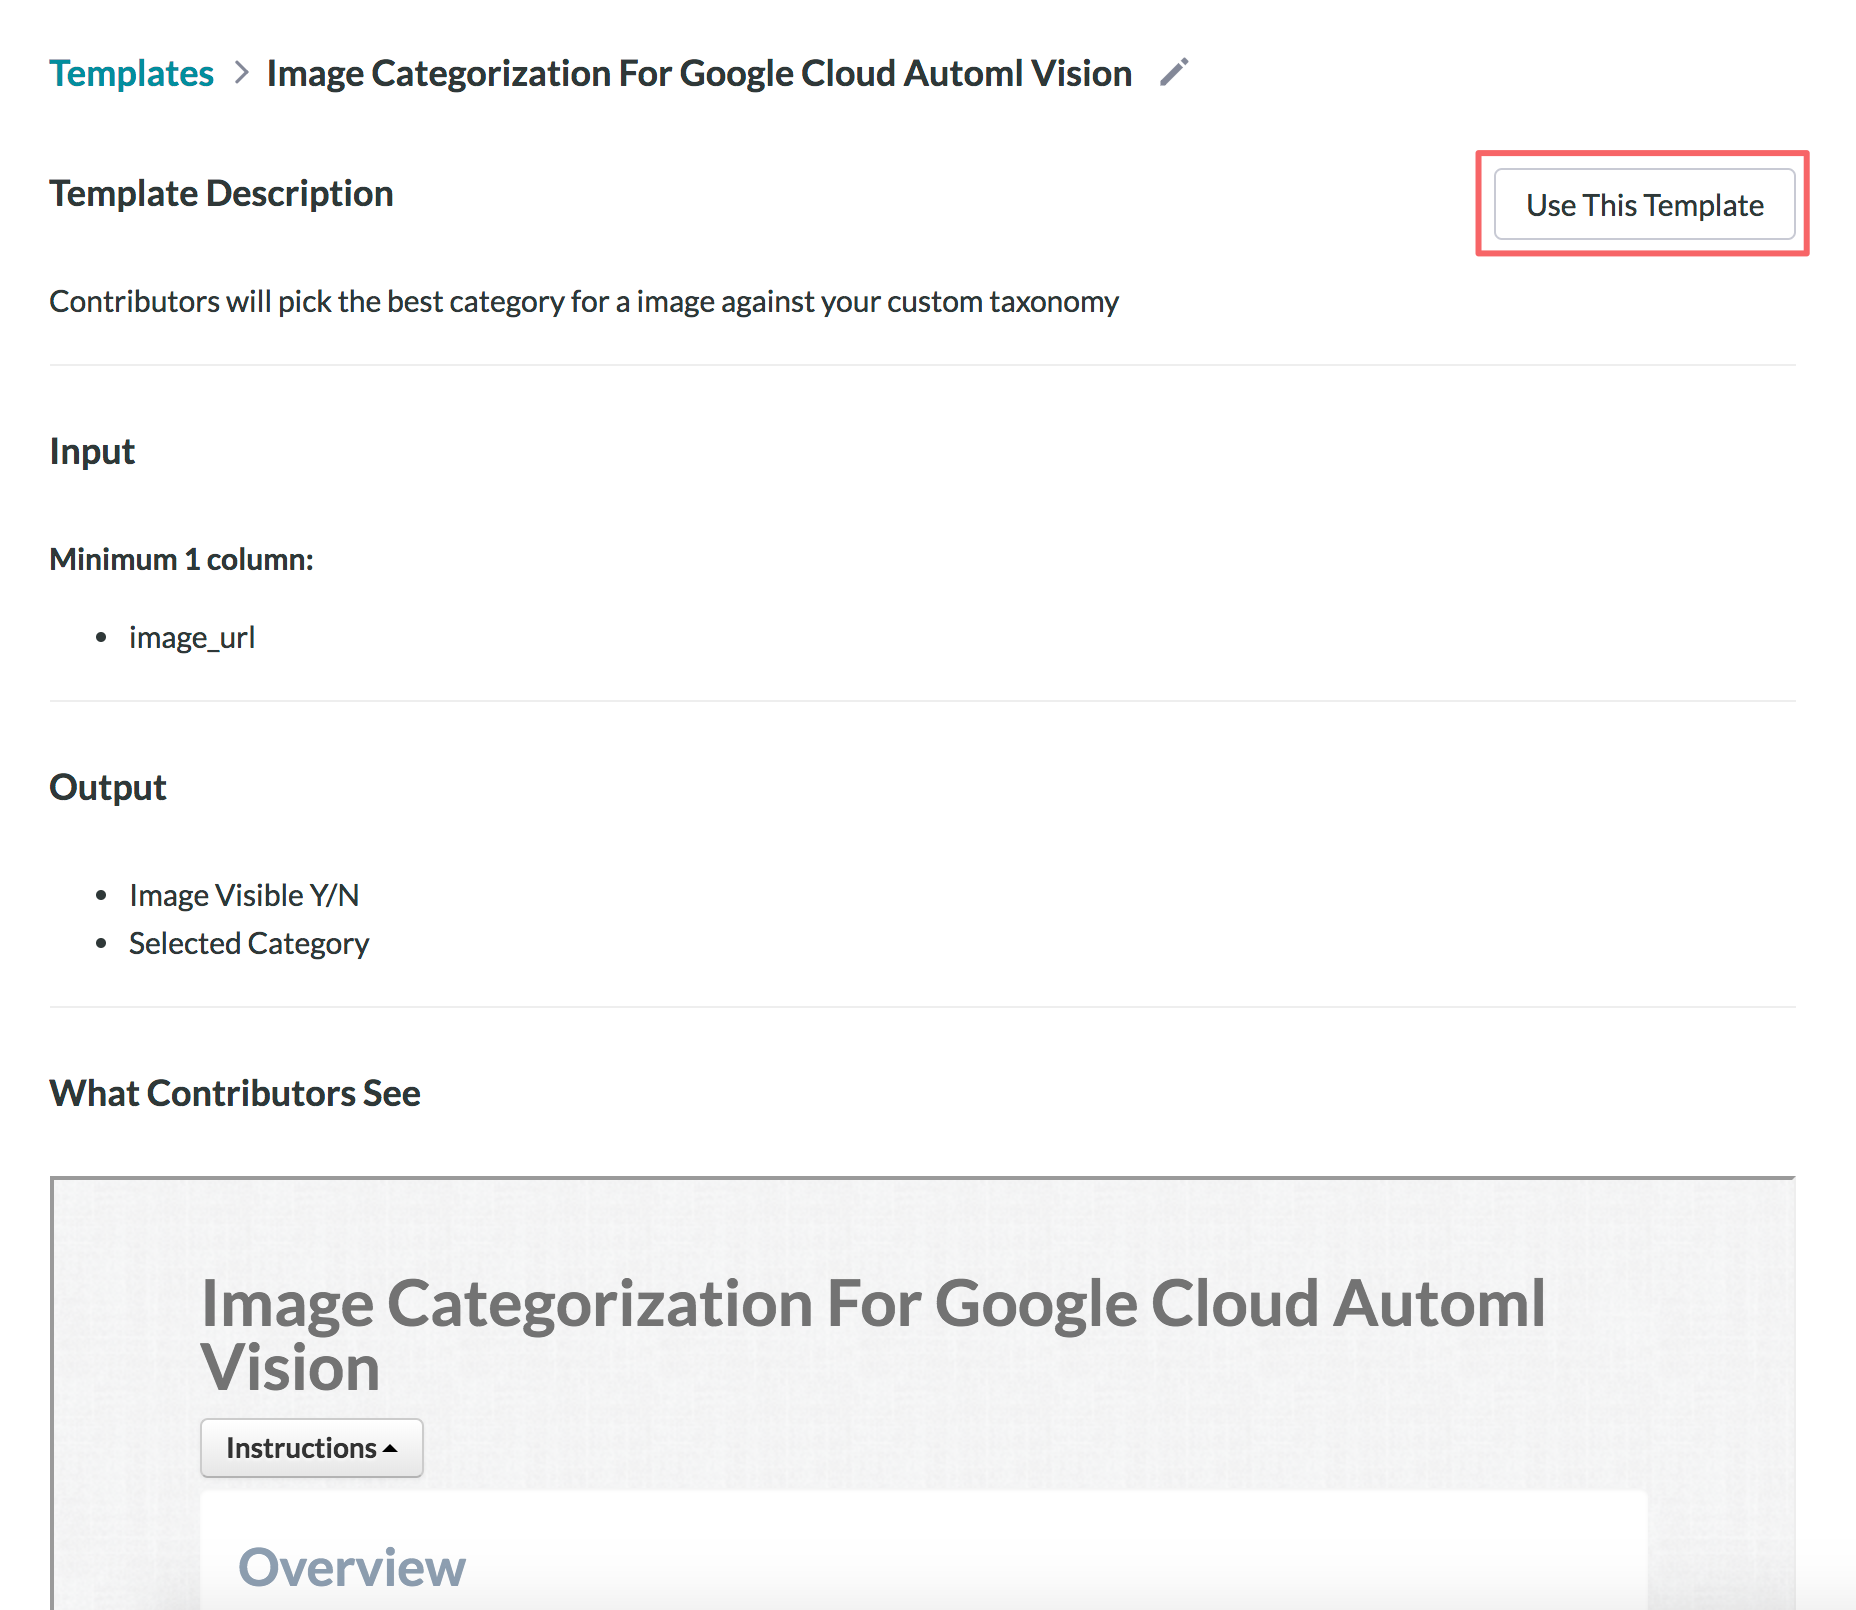
- Use the template provided to get started
- Prepare your data
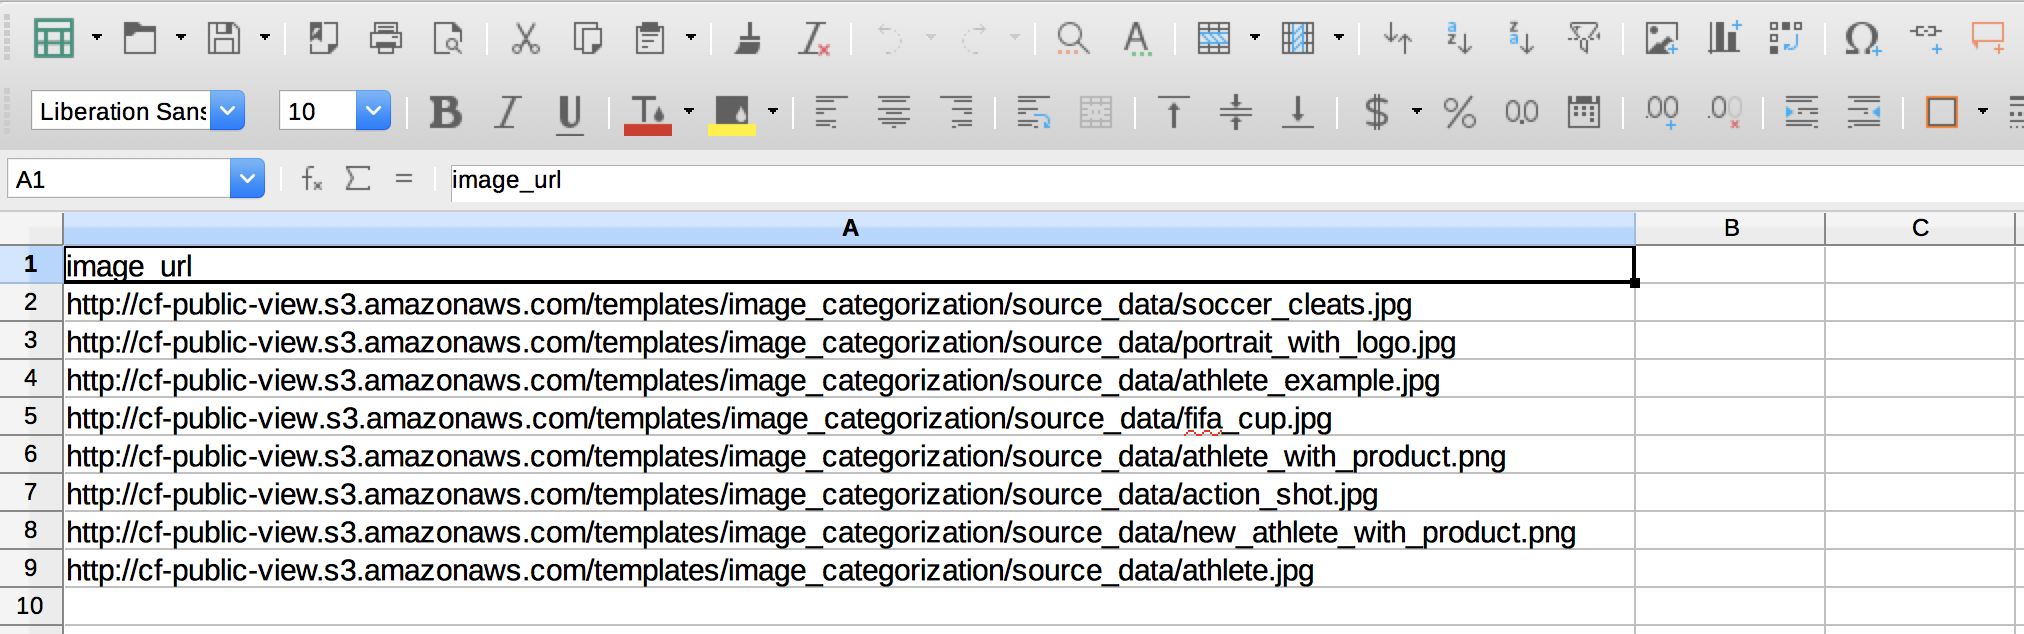
- Put all image URLs in a .csv in a column titled image_url
- It is important to format your data before uploading to the platform
- It is best to use a UTF-8 encoded .CSV, however .TSV, .XLSX, and .ODS file formats are also acceptable and require UTF-8 encoding
- Upload your data
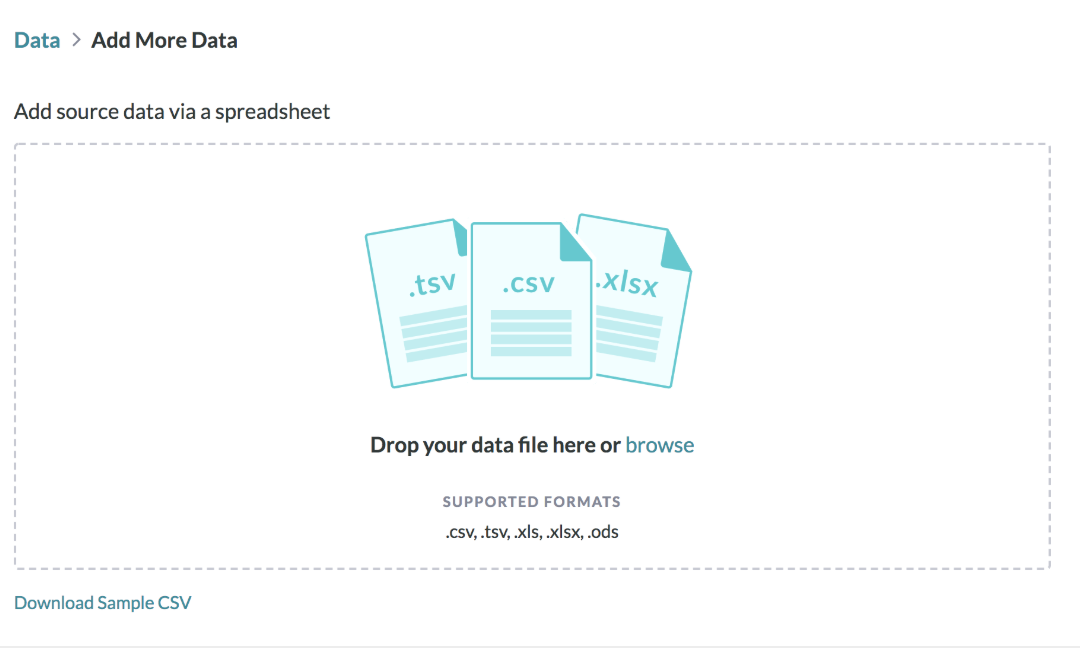
- To upload your data, drop your data file into the platform or directly browse files from your computer
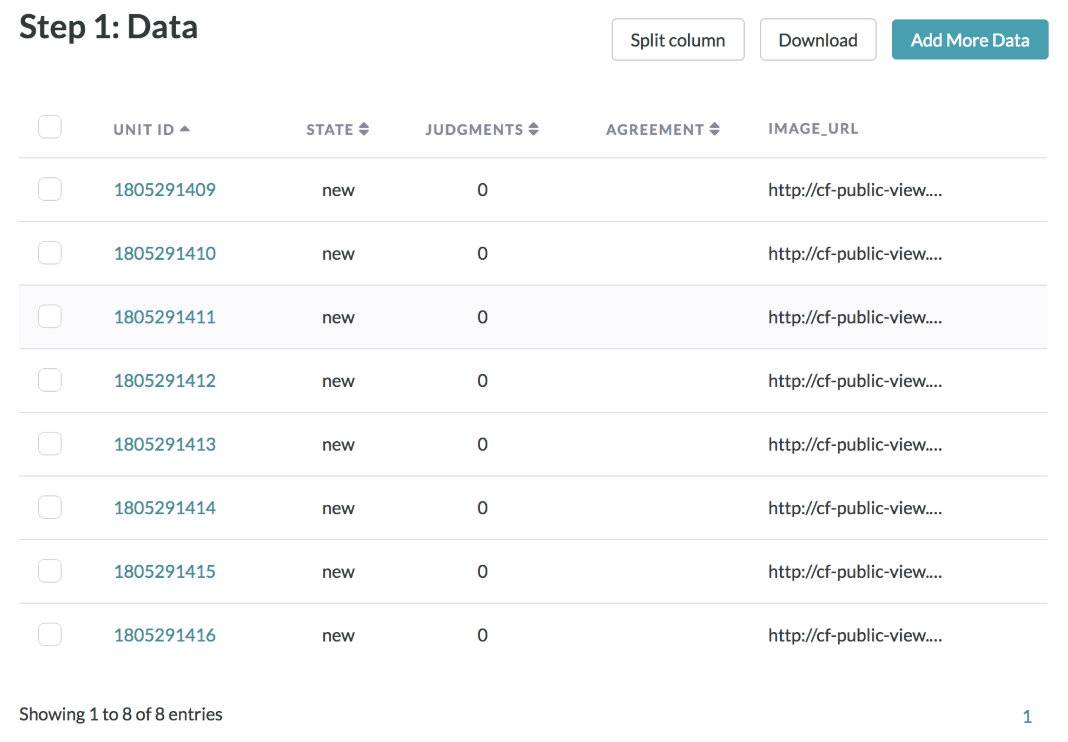
- Review data that has been uploaded
- Design
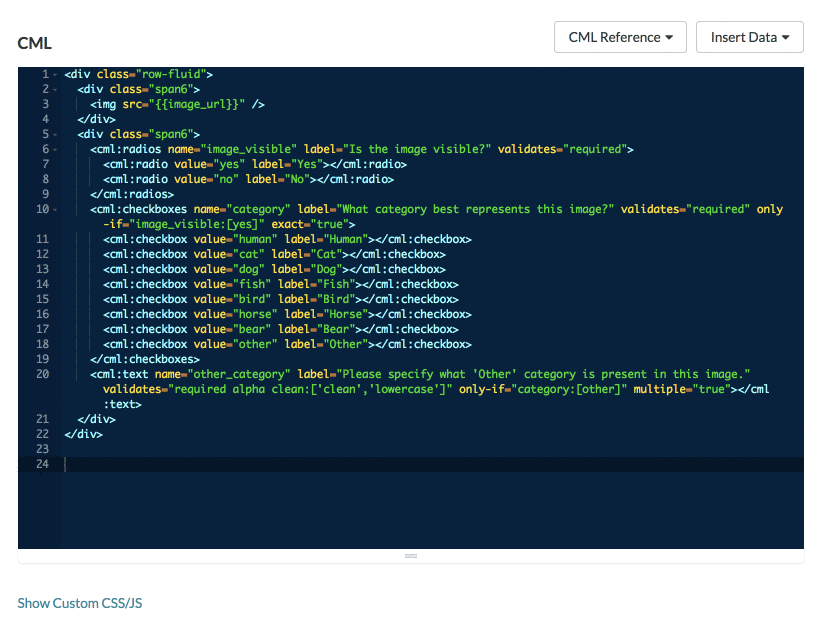
- Customize CML Options for Categorization
- CML (Custom Markup Language) has similar syntax to HTML and allows you to add code snippets to customize the job.
- For more information, please reference our Guide to the Code Editor
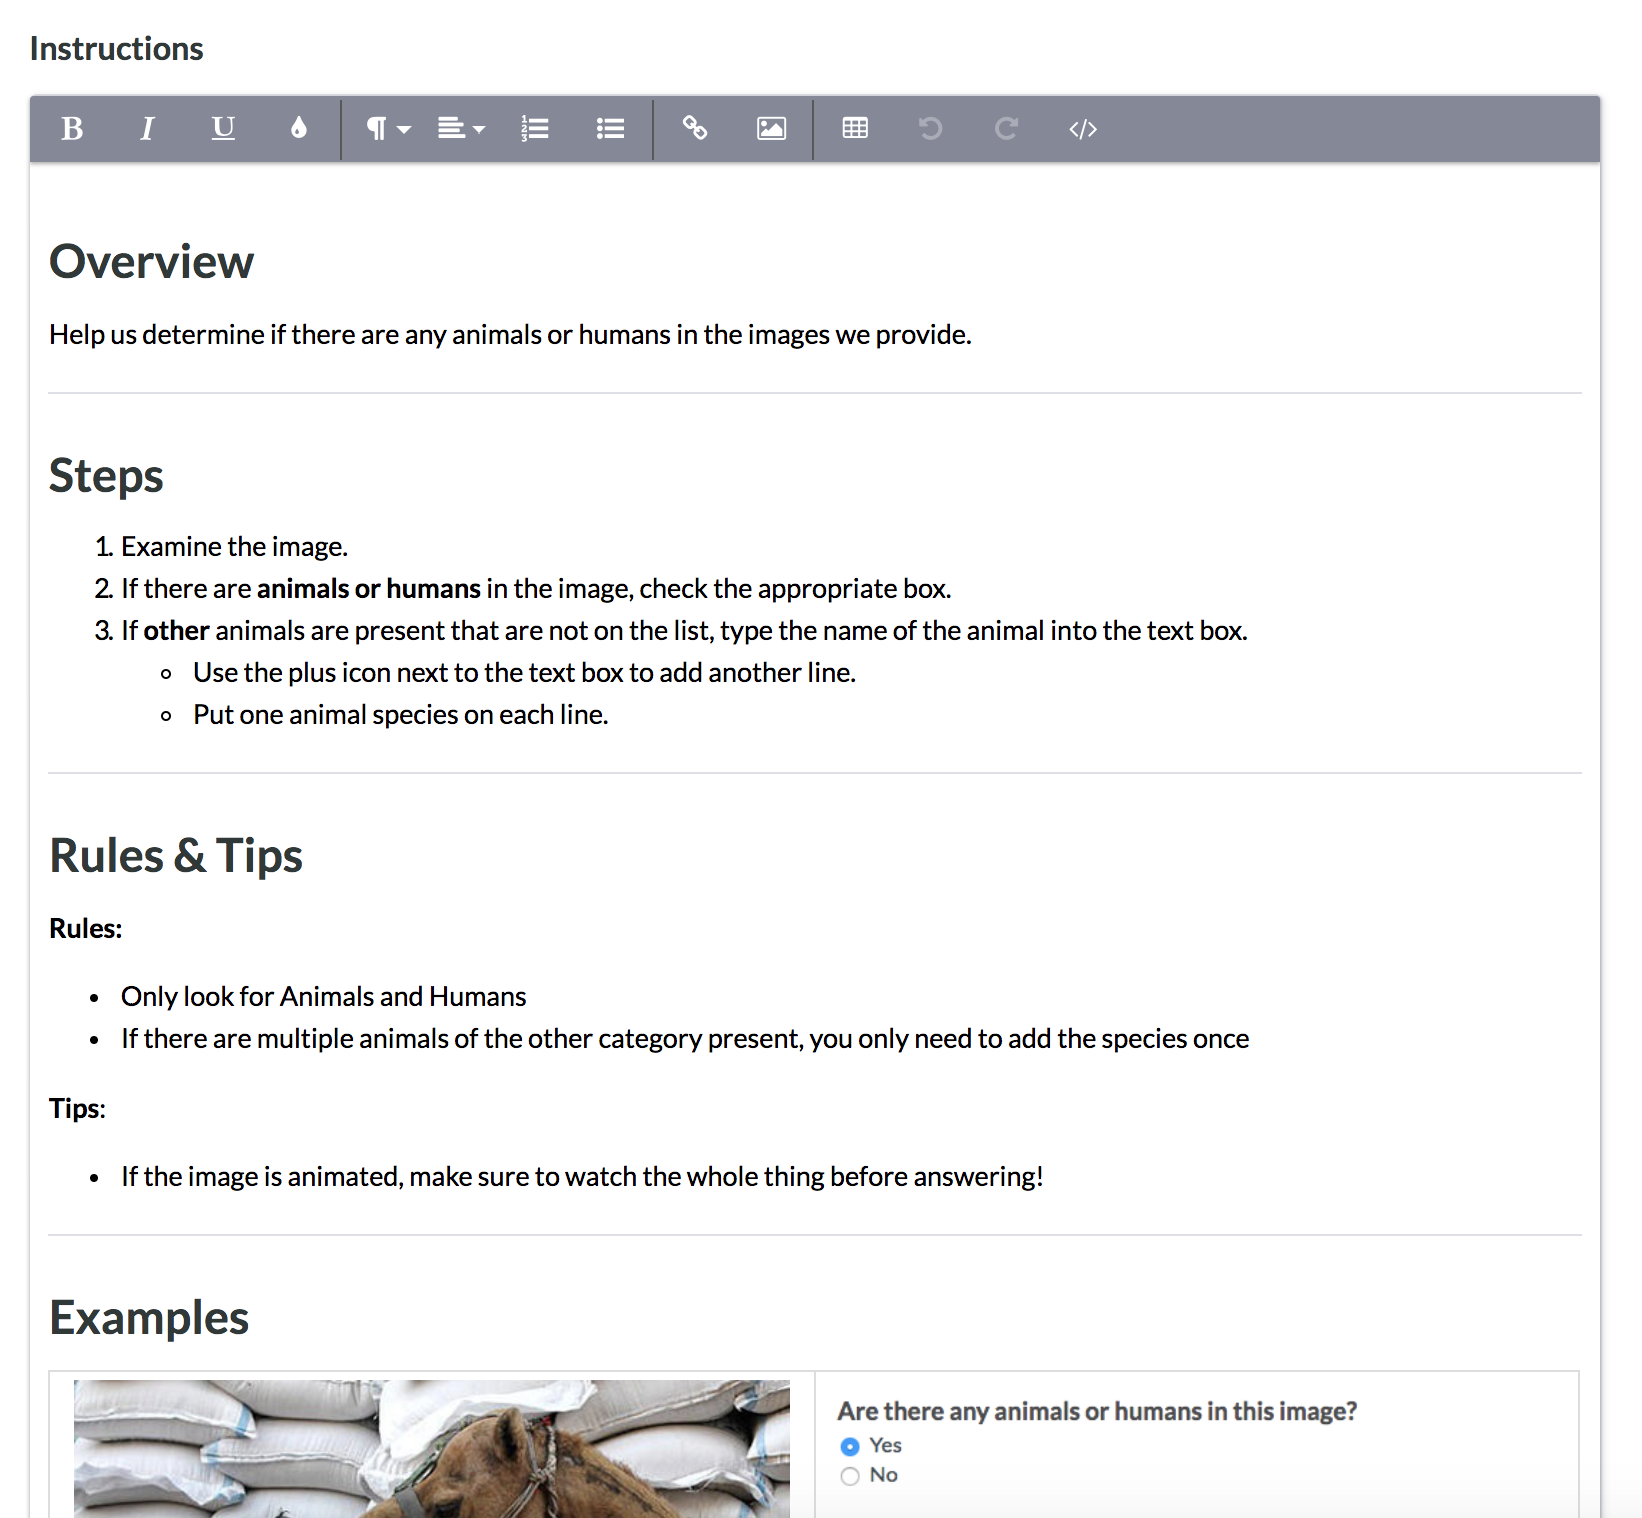
- Customize Instructions
- This section is where you will provide all necessary context for annotators to label the data. Please provide step by step instructions, rules, definitions, and any examples for the job.
- The text editor is a typical WYSIWYG, which allows you to add text, images, etc.
- For more information, recommendations and best practices forbuilding instructions, please read the Guide to Instructions
- Preview the job
- You can preview the job design and view the changes you made to the CML and Instructions by clicking the Preview icon in the top right corner of the page.
- Quality
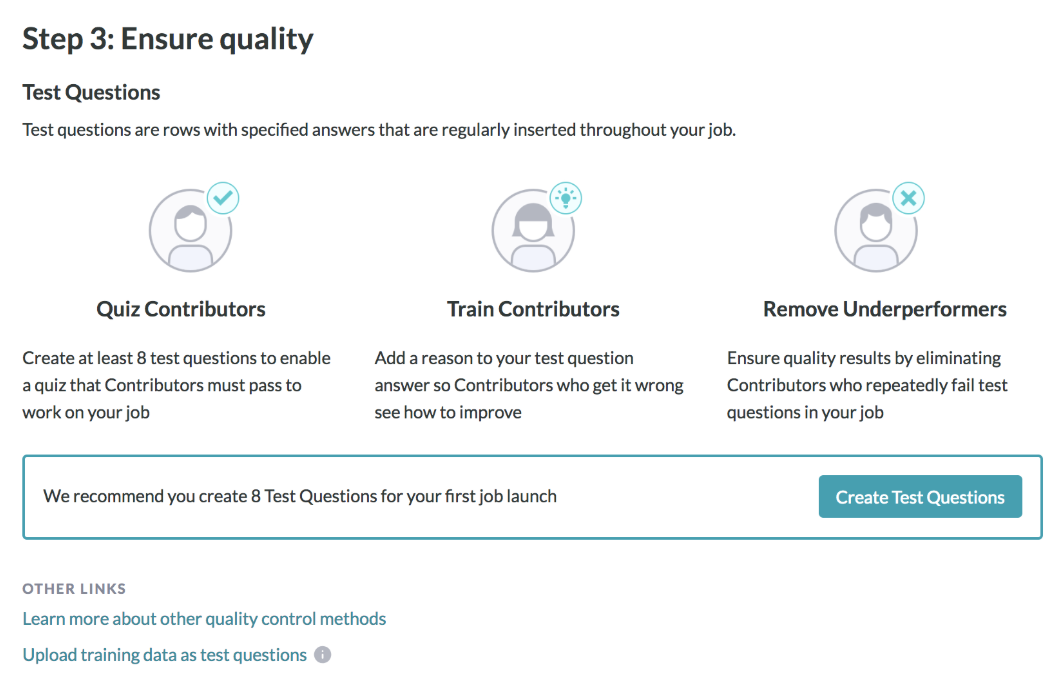
- Test Questions
- Test questions are actual rows of your dataset that you have pre-labeled with known answers to continuously test and train contributors throughout the job.
- As a best practice, you should create 20-30 Test Questions
- For more information, please read How to create Test Questions
- Settings
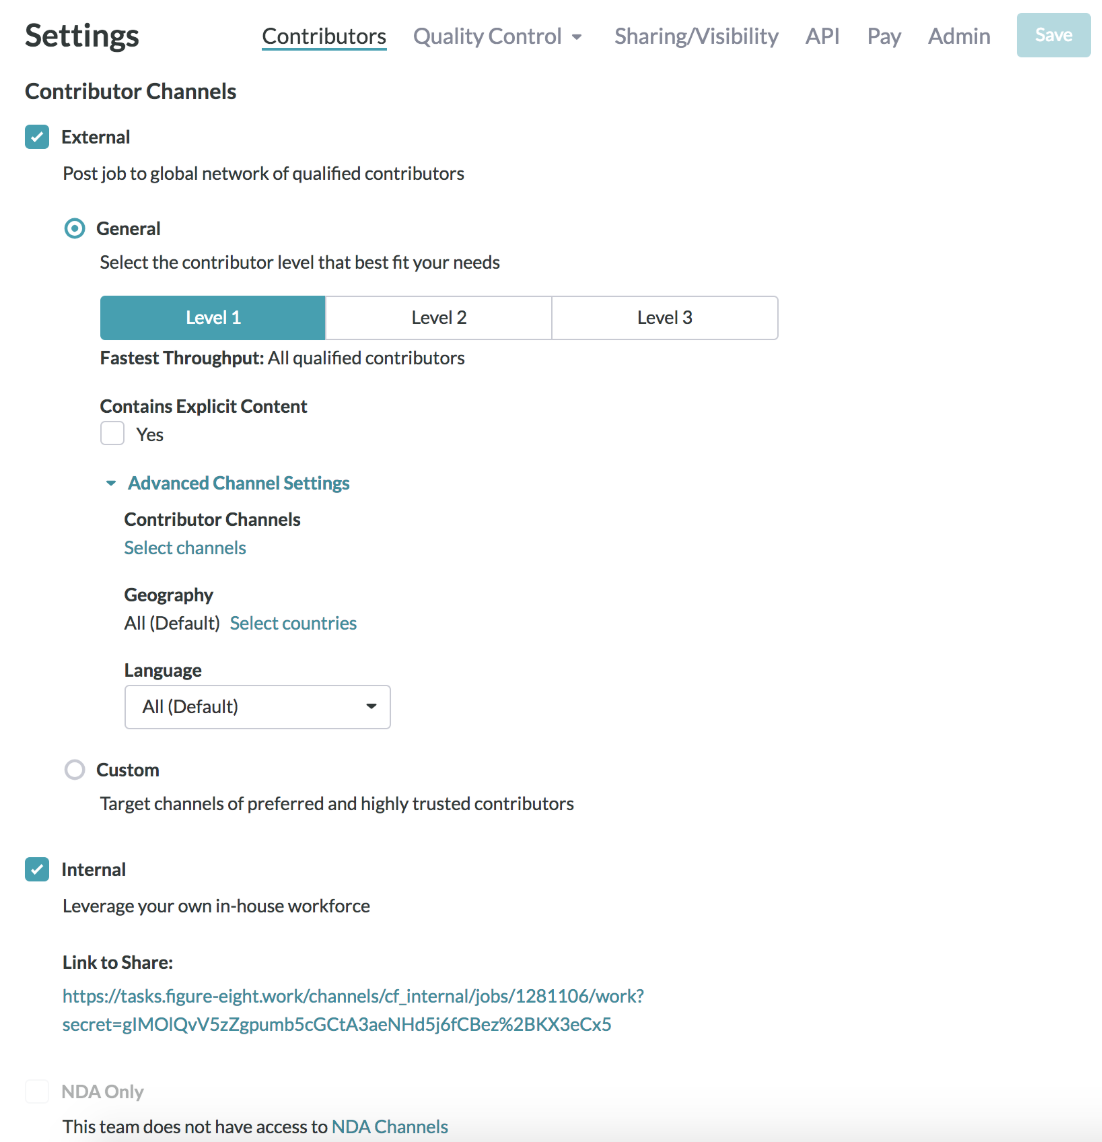
- The Contributors Channels section is used to control which contributors will be able to work on a job. The contributor levels (Level 1, Level 2, Level 3) are options that are available to best fit your needs. You can also select to launch the job internally, externally or both.
- Definitions and other common settings can be found here.
- Test Run and Monitor
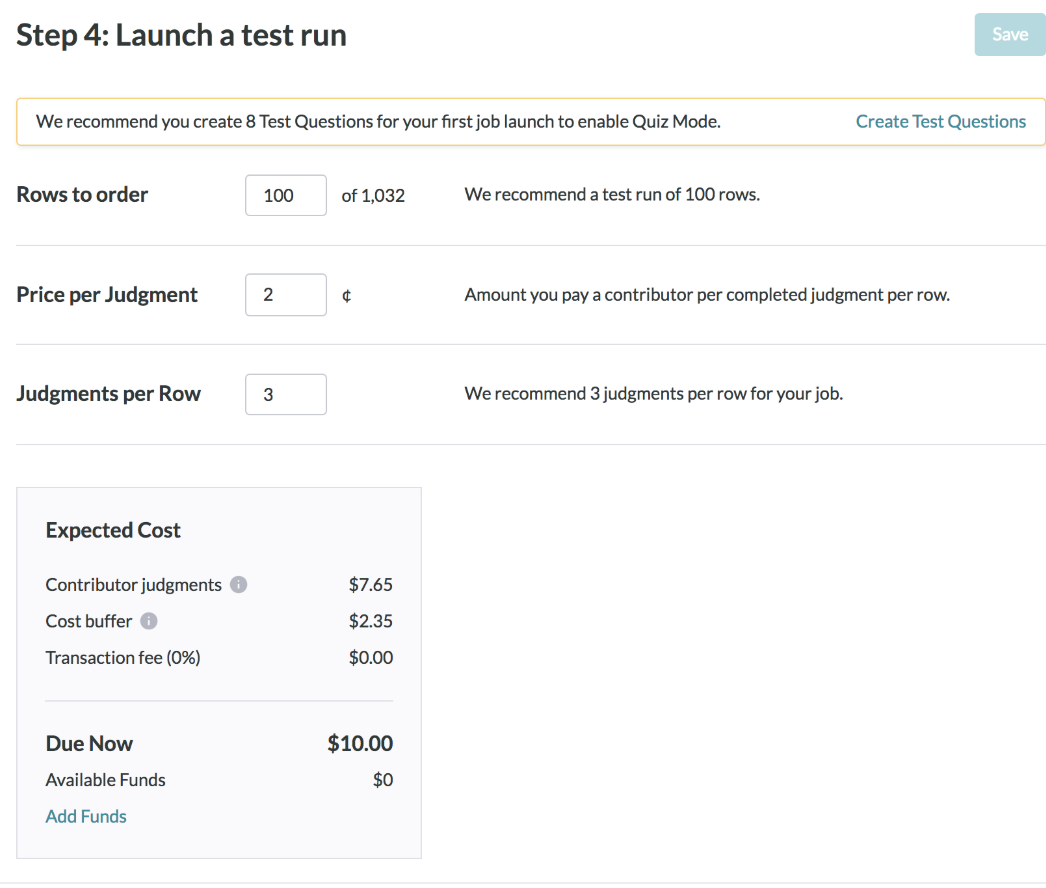
- On the Launch Page, you will have three settings: Rows to order, Price per Judgement, and Judgements per Row. Launching jobs on the Appen platform is an iterative process, so we recommend a test run of 100 rows before launching your job with production volumes.
- After the settings are finalized and job is ready to go, click “Launch Job”
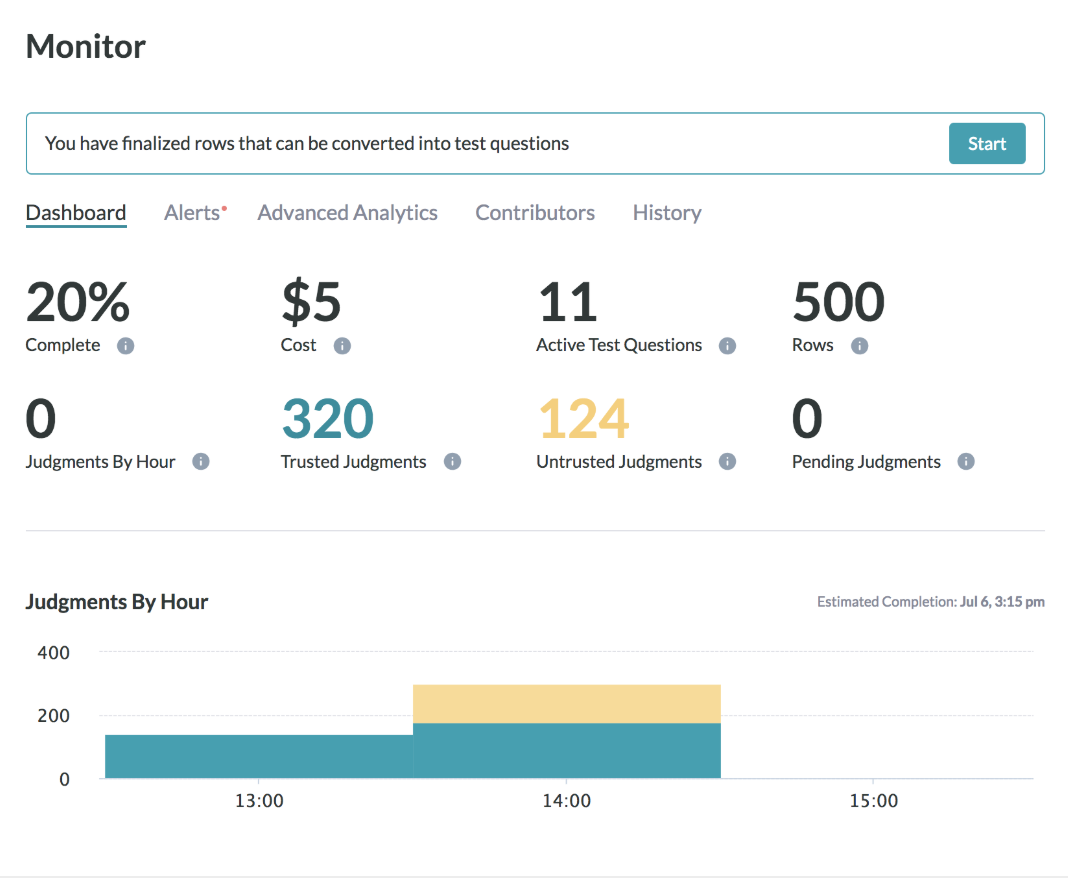
- Monitor
- The Dashboard Page displays the most relevant information pertaining to the job during and after the job has been completed. The metrics are updated in real time.
- Results
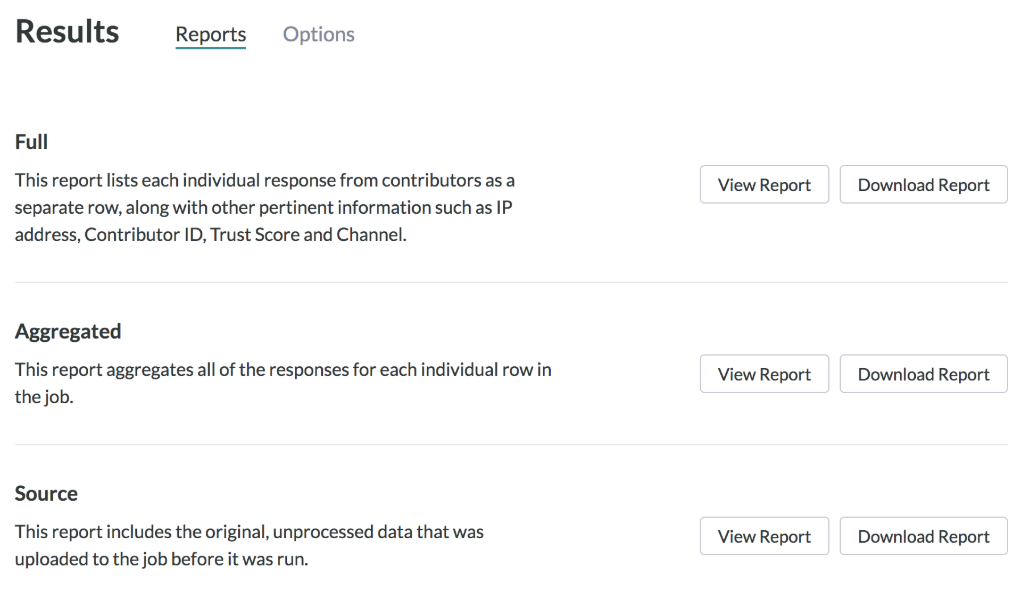
- Review results from the Results section by downloading the reports.
- The most used reports are the Full and Aggregated Reports. For the aggregated reports, the Options tab allows you to adjust the aggregation on specific results.
- For more information, read our Guide to Reports
- Launch remaining rows
- After reviewing the initial results, we highly recommend making any necessary updates to the job design and instructions before launching the remaining rows.
- Download and review final reports
- From the Results section, you can download the reports.